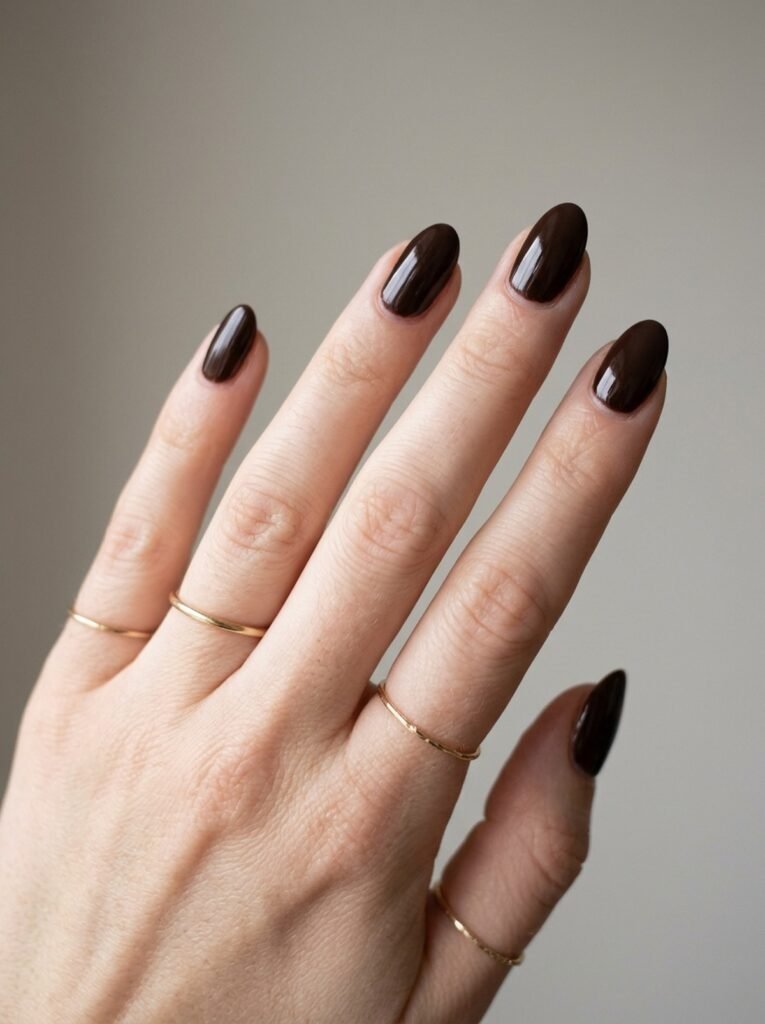
Chocolate brown winter nails are winter’s quiet luxury. It’s warmer than black, richer than nude, and it goes with every coat, knit and gold ring you own — which is why girls who try it once tend to stay with it all season. And it’s not one colour: milk chocolate, dark chocolate, espresso, cocoa with a chrome shine or a velvet glow, each one a completely different mood on the same hand.
Every design below is one chocolate idea, changed by shade, finish or one tiny detail. Pick your top three, screenshot them, and show your tech the photo plus the exact salon ask underneath. That’s the whole trick.
Save this for your next salon appointment. Screenshot your top three, show your tech the photo, and use the exact salon ask under each design.
Quick Picks
- Best overall#1 Classic Dark Chocolate Gloss — the one everyone recognises
- Best minimal#6 Milk Chocolate with a Thin Gold Line — barely-there, still winter
- Best chrome#2 Chocolate Chrome — pure shine, zero glitter mess
- Best velvet#3 Chocolate Velvet Cat-Eye — the cosiest one here
- Best French#7 Espresso French Tips — the French for girls who find white tips plain
- Best no-art#4 Solid Espresso — all colour, one perfect shade
- Best party#9 Chocolate Glitter Fade — sparkle, but soft
- Best short#14 Short Milk Chocolate — short nails, still so expensive
- Best budget copy#18 Chocolate Press-Ons — salon look, drugstore price
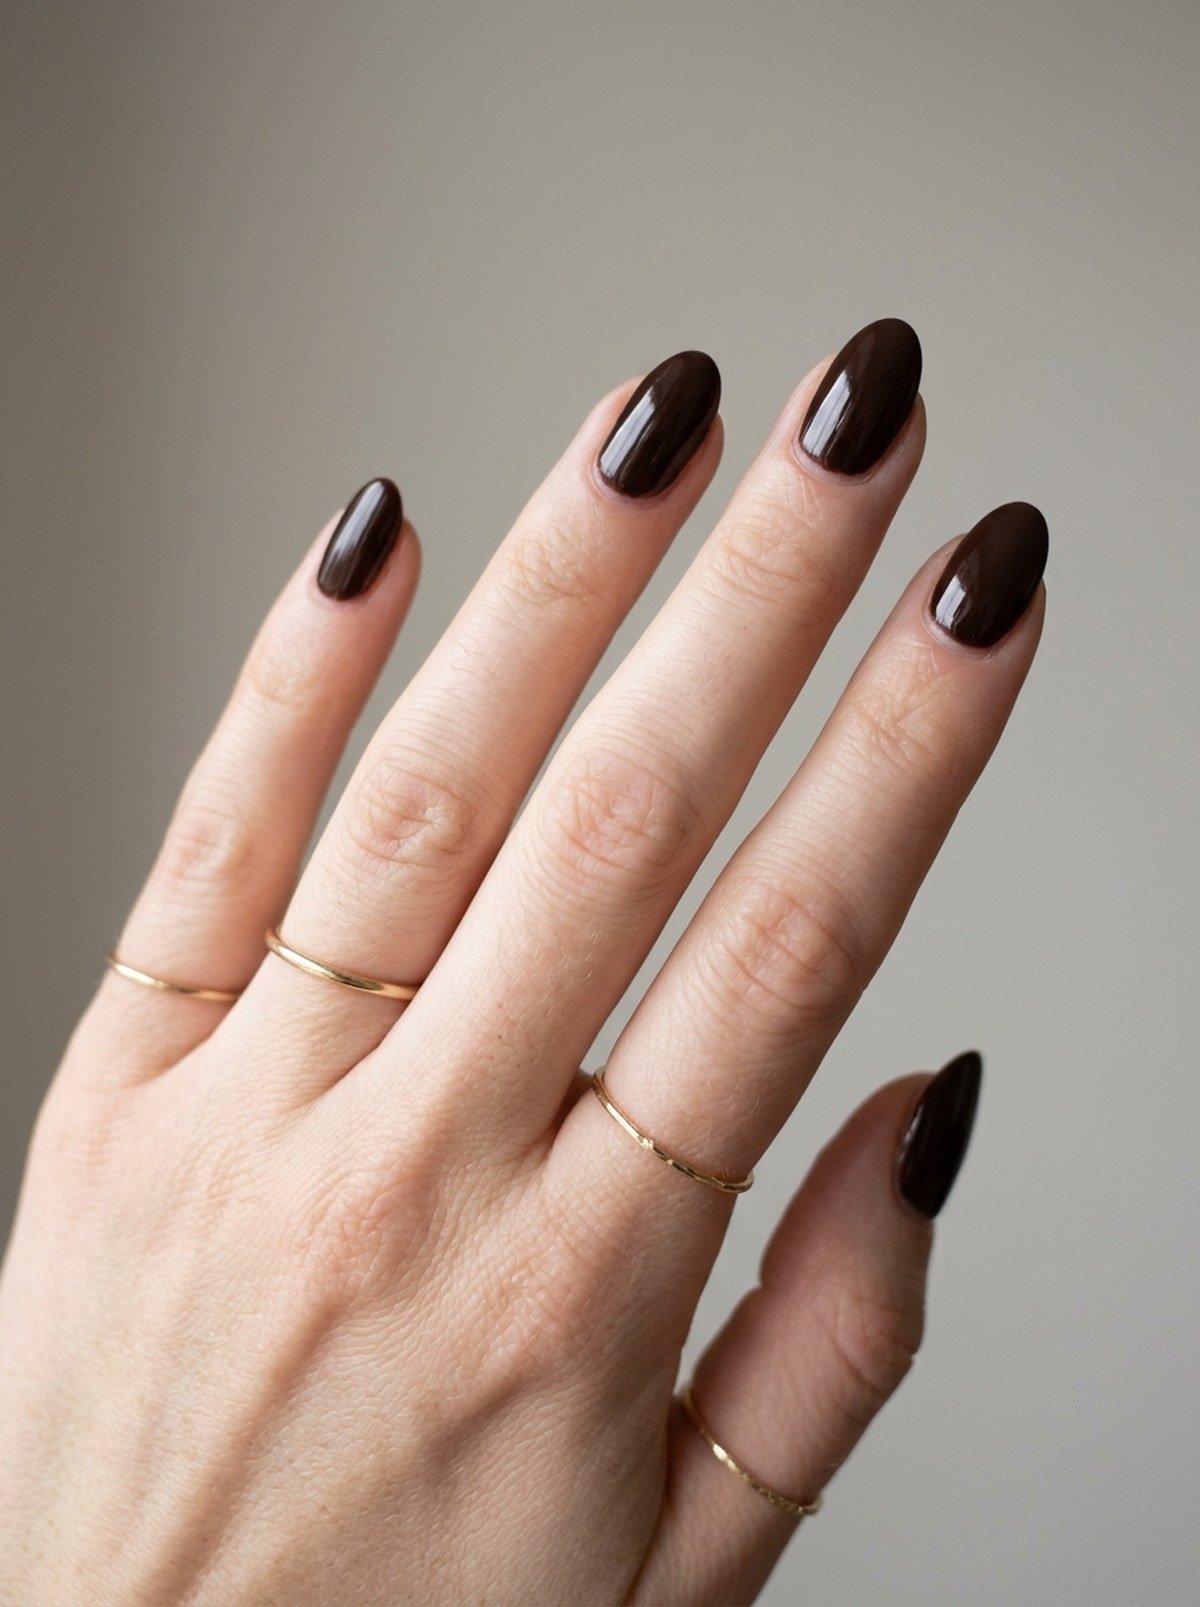
1. Classic Dark Chocolate Gloss
This is the design people picture when they say chocolate nails: a deep dark-chocolate base, glossy as glass, on medium almond nails. It goes with everything you own in winter — black coats, cream knits, gold jewellery, a burgundy lip — and it never looks like you tried too hard, because the colour is doing all the work.
The secret is the shade. Ask your tech for a true dark chocolate, not black-brown and not milk — the one that reads brown in daylight and almost black in the evening. Two coats, a thick glossy top coat, and the whole design is done. It’s the brown that makes every other colour on this list make sense.
Get the look: a deep dark-chocolate gel polish + glossy top coat.
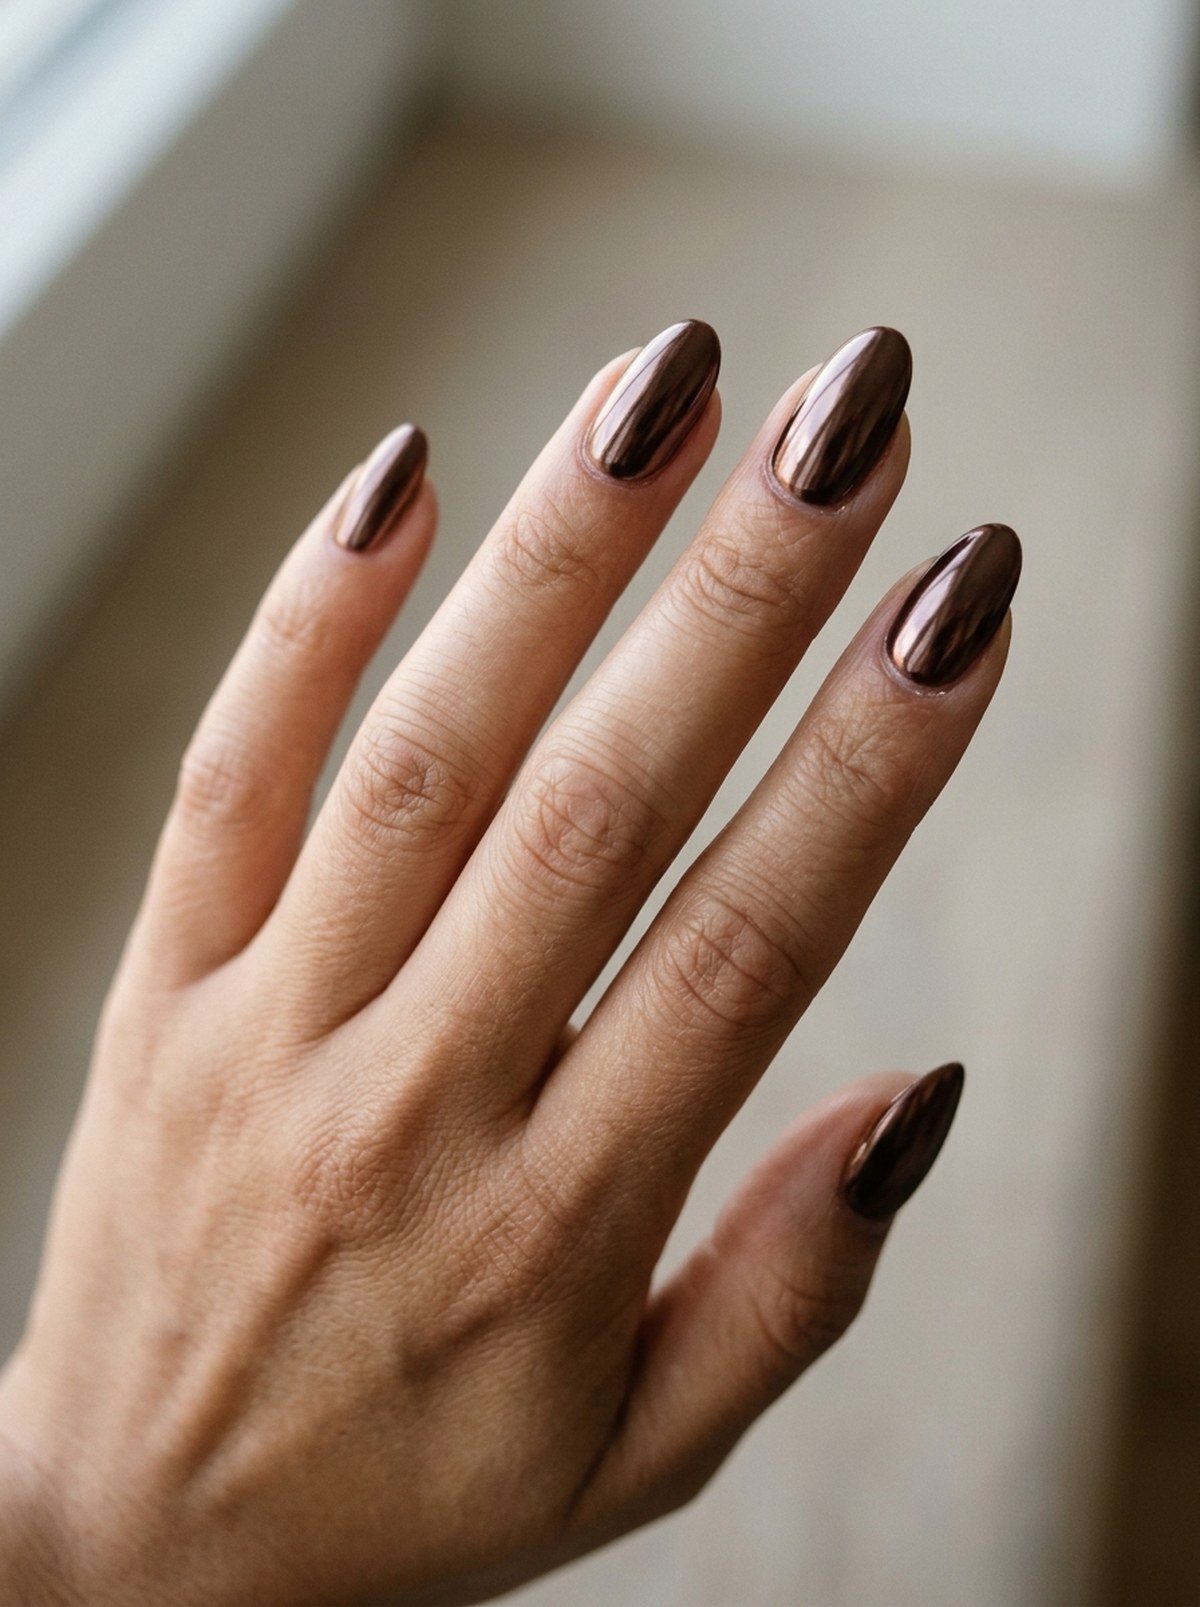
2. Chocolate Chrome
Chocolate chrome is the party version of the classic — a mirror-shine brown base that catches the light like polished cocoa. From across the room it reads as pure shine; up close, there’s your chocolate, warm and rich. It’s the one girls who never do nail art actually ask for, because chrome is the art.
It works because the chrome is kept clean and even, so the whole hand stays polished. Ask for the chrome powder buffed over a dark brown base, sealed under a glossy top coat, and keep the nails medium almond or squoval so the shine stays in proportion. No glitter, no accent — chrome is enough.
Get the look: a dark brown gel polish + chocolate chrome powder + glossy top coat.

3. Chocolate Velvet Cat-Eye
Velvet cat-eye is the cosiest finish in this whole list, and chocolate is its best colour. The magnetic gel shifts from deep espresso to warm milk chocolate as your hand moves, like velvet catching the light — and it needs no accent at all, because the glow is the design. It’s a set that photographs beautifully, which is exactly why it gets saved.
Ask your tech to magnetise the cat-eye in the same direction on every nail so the glow lines up, then seal it under a glossy top coat. It’s a design that looks different in every light, so take your screenshot in daylight and in warm evening light — you’ll love it in both.
Get the look: a chocolate magnetic cat-eye gel polish + glossy top coat.
4. Solid Espresso
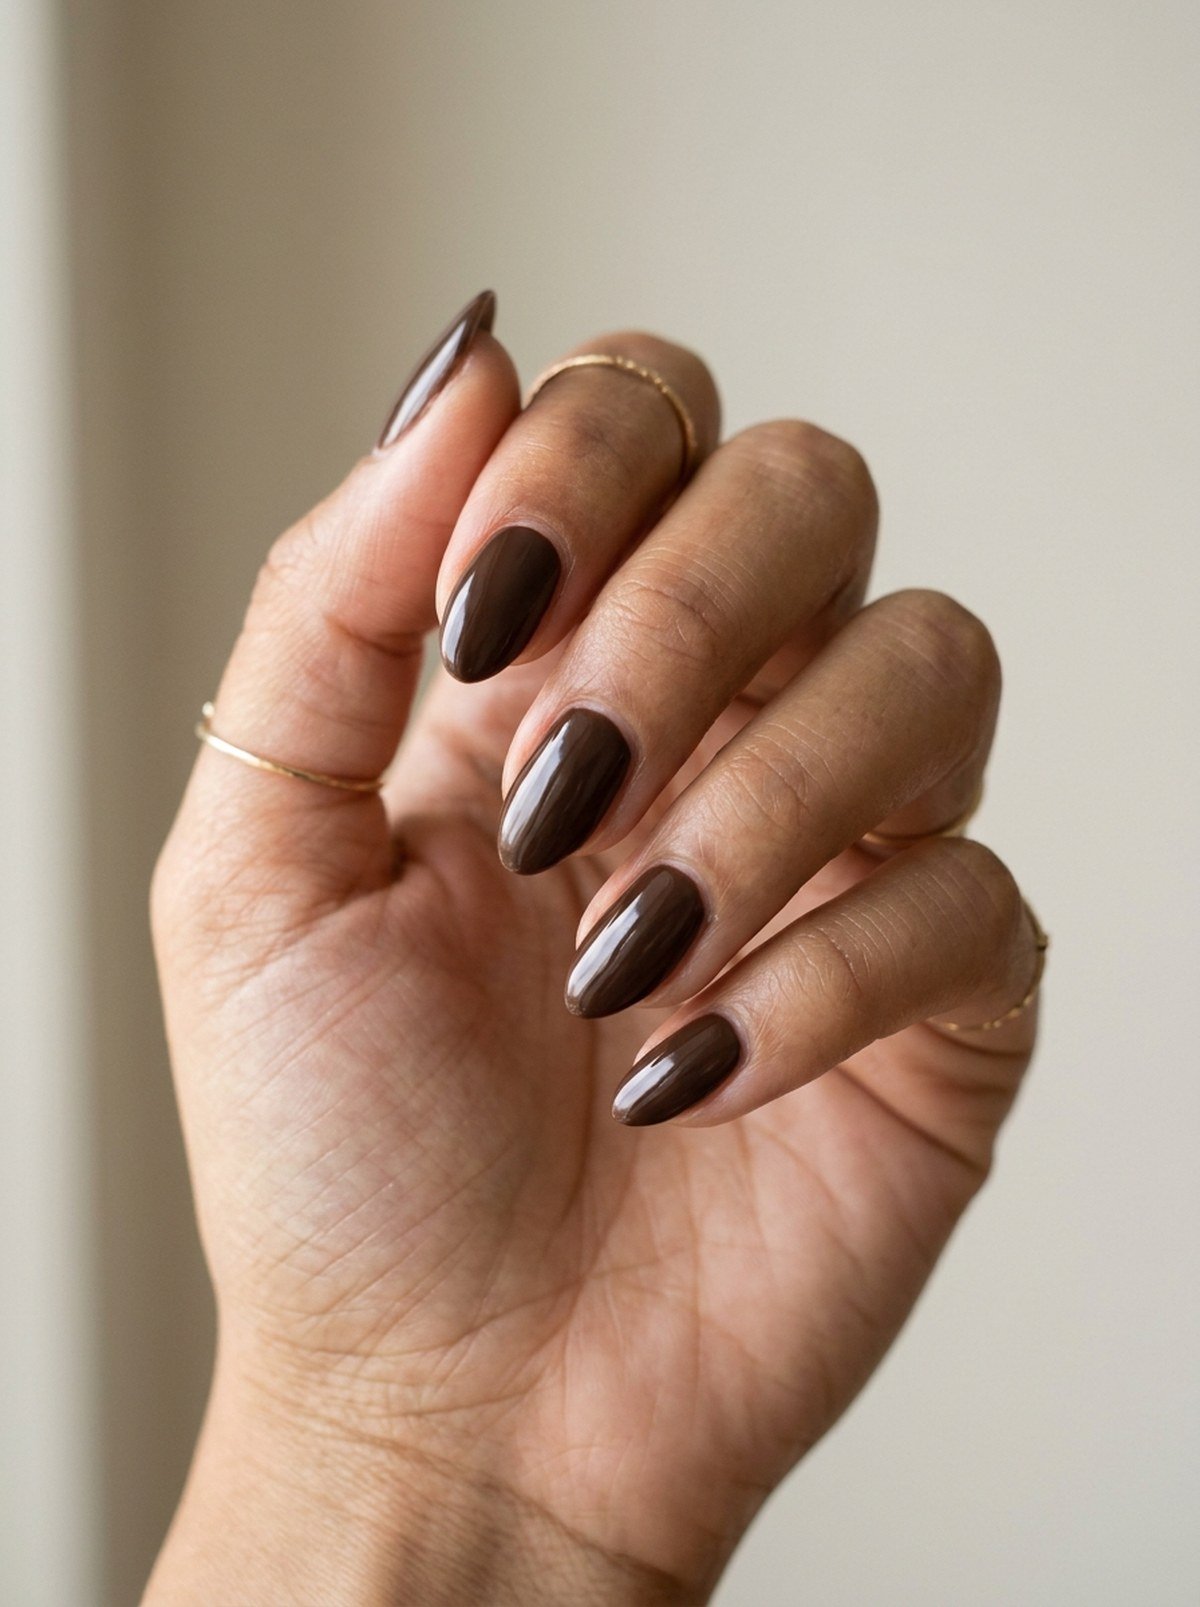
Espresso is chocolate at its darkest — almost black, but warmer, softer, and far more flattering on the hand. A solid espresso base, glossy and even, is the winter equivalent of a black nail, only it doesn’t wash you out, and it goes with gold jewellery in a way black never quite does.
Keep it simple: one colour, two coats, gloss. Ask your tech to keep the cuticles immaculate, because a dark solid shows every extra — that’s also why it looks so expensive when it’s done well. It’s the design for girls who want one colour, perfect, done.
Get the look: an espresso gel polish + glossy top coat.
5. Milk Chocolate Ombre
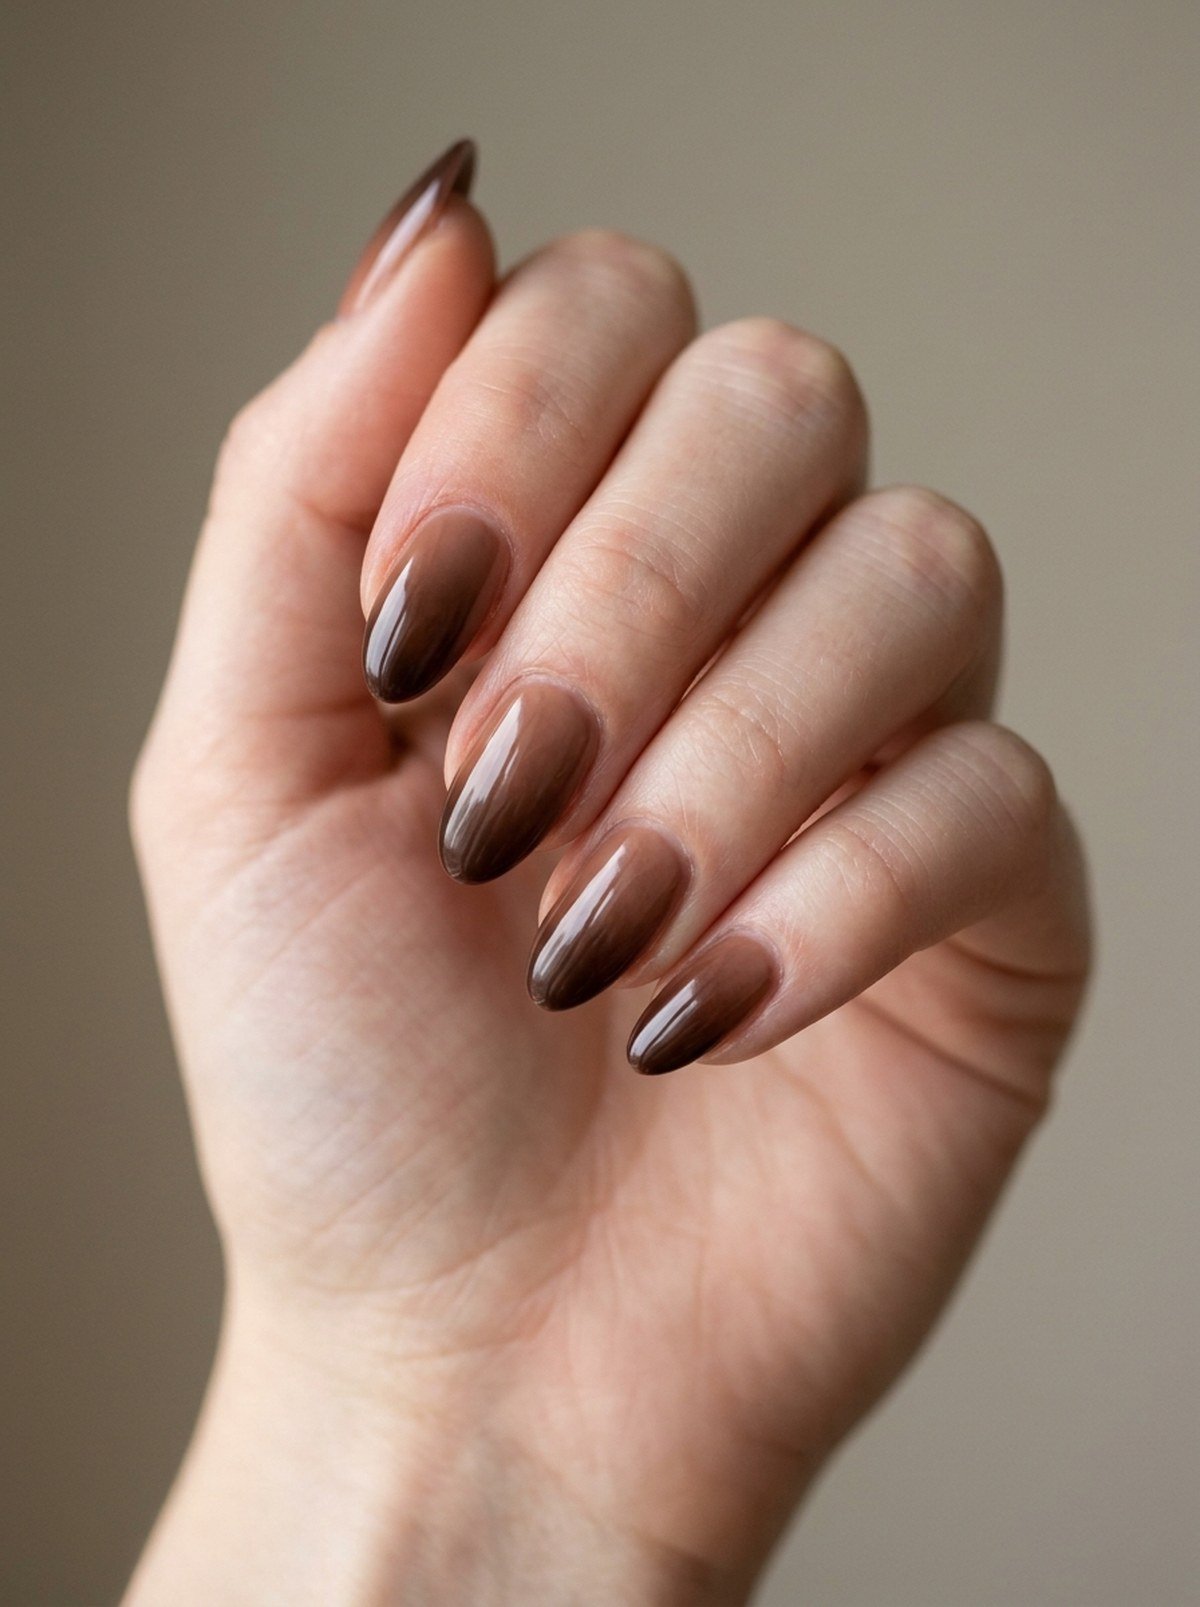
An ombre from milk chocolate at the cuticle to dark chocolate at the tip — like a latte fading into espresso — is the softest way to wear brown. It reads as one colour, just deeper at the ends, and it makes the nails look longer, which is why girls with short nail beds love it. It’s also the most forgiving ombre, because brown blends where pink and white would show a line.
The trick is the blend: it should melt, not stop in a hard line. Ask for a sponge application on the darker shade and a smooth top coat over everything, so the nails feel glassy, not gritty. Keep the other nails plain milk chocolate so the ombre ones shine.
Get the look: milk chocolate and dark chocolate gel polishes, blended with a sponge + glossy top coat.
6. Milk Chocolate with a Thin Gold Line
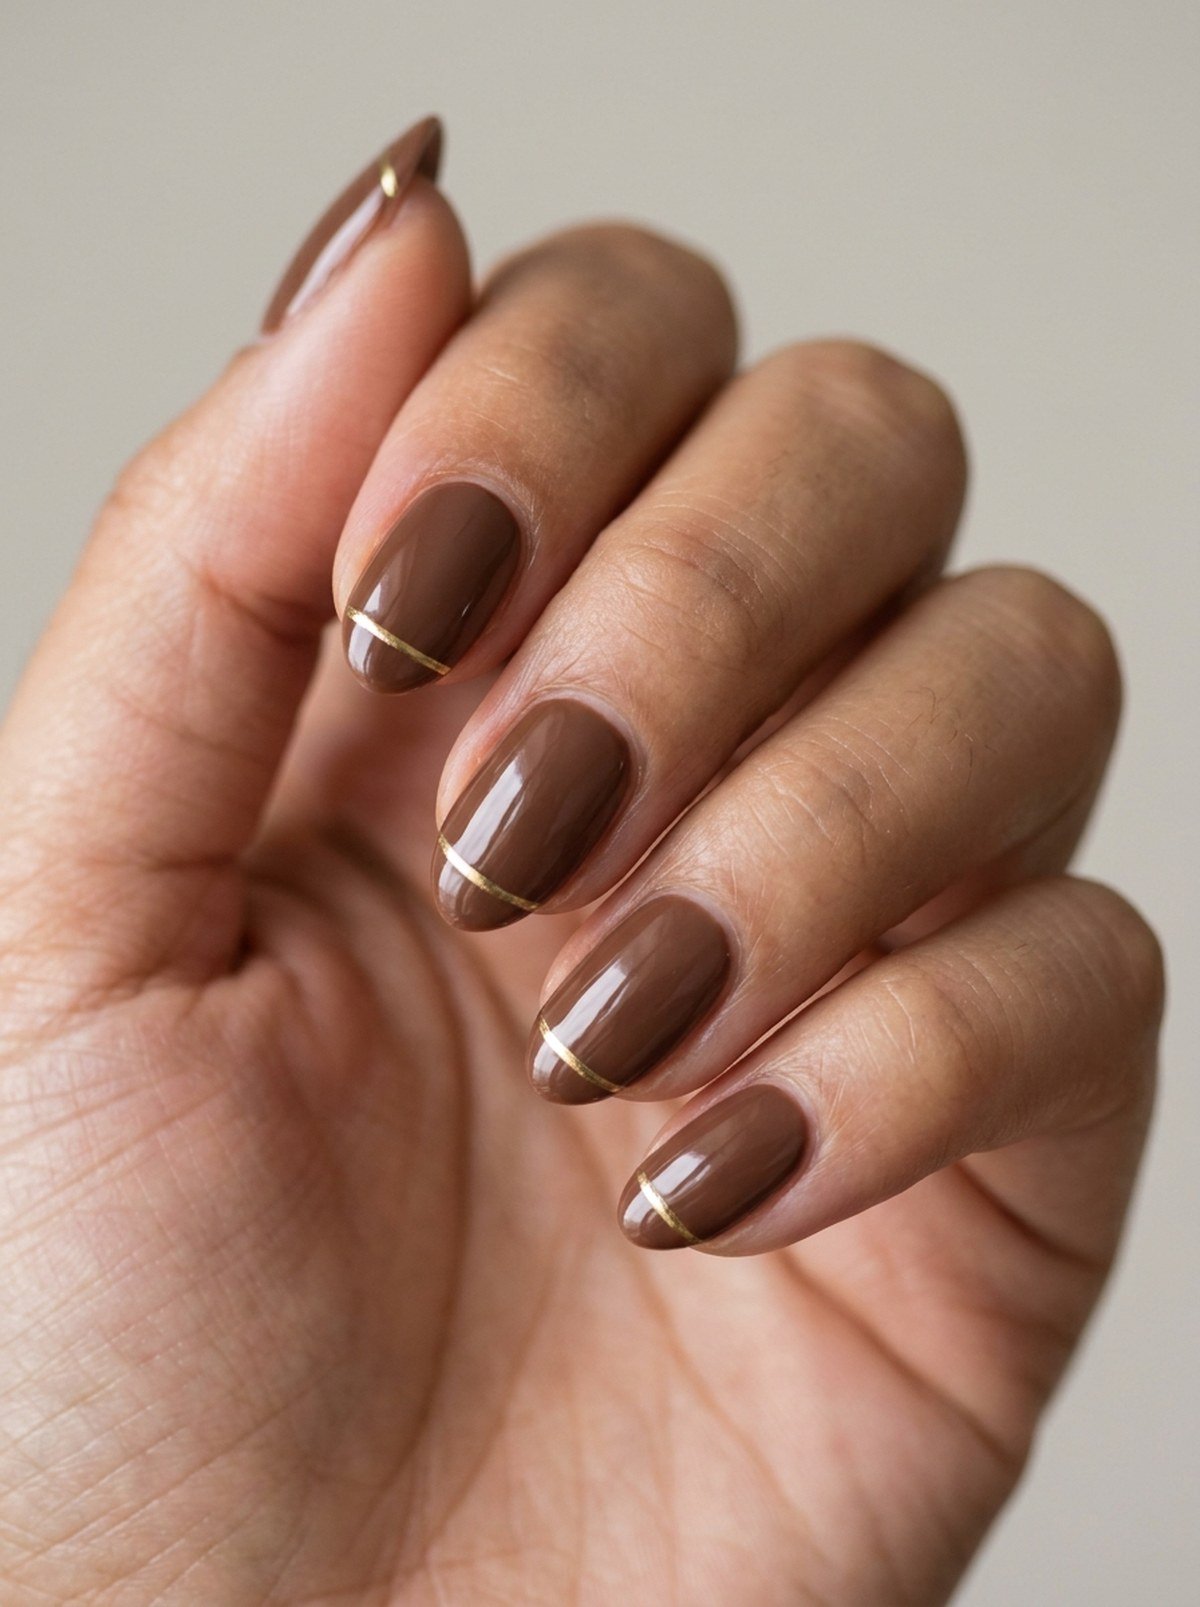
This is the minimalist’s chocolate: a milk-chocolate base, glossy and soft, with one thin gold line painted across each nail near the tip — and that’s it. No glitter, no accent, no second colour. It reads as clean, expensive and very grown-up, and it’s the design girls who never do nail art actually keep.
The trick is the line. Ask for it thin, straight, and in metallic gold gel, not foil, so it stays crisp and doesn’t lift. One line per nail, same place on every nail, so the hand looks deliberate rather than decorated. Keep the nails short almond — this design is at its best when it’s neat.
Get the look: a milk chocolate gel polish + metallic gold striping gel.
7. Espresso French Tips
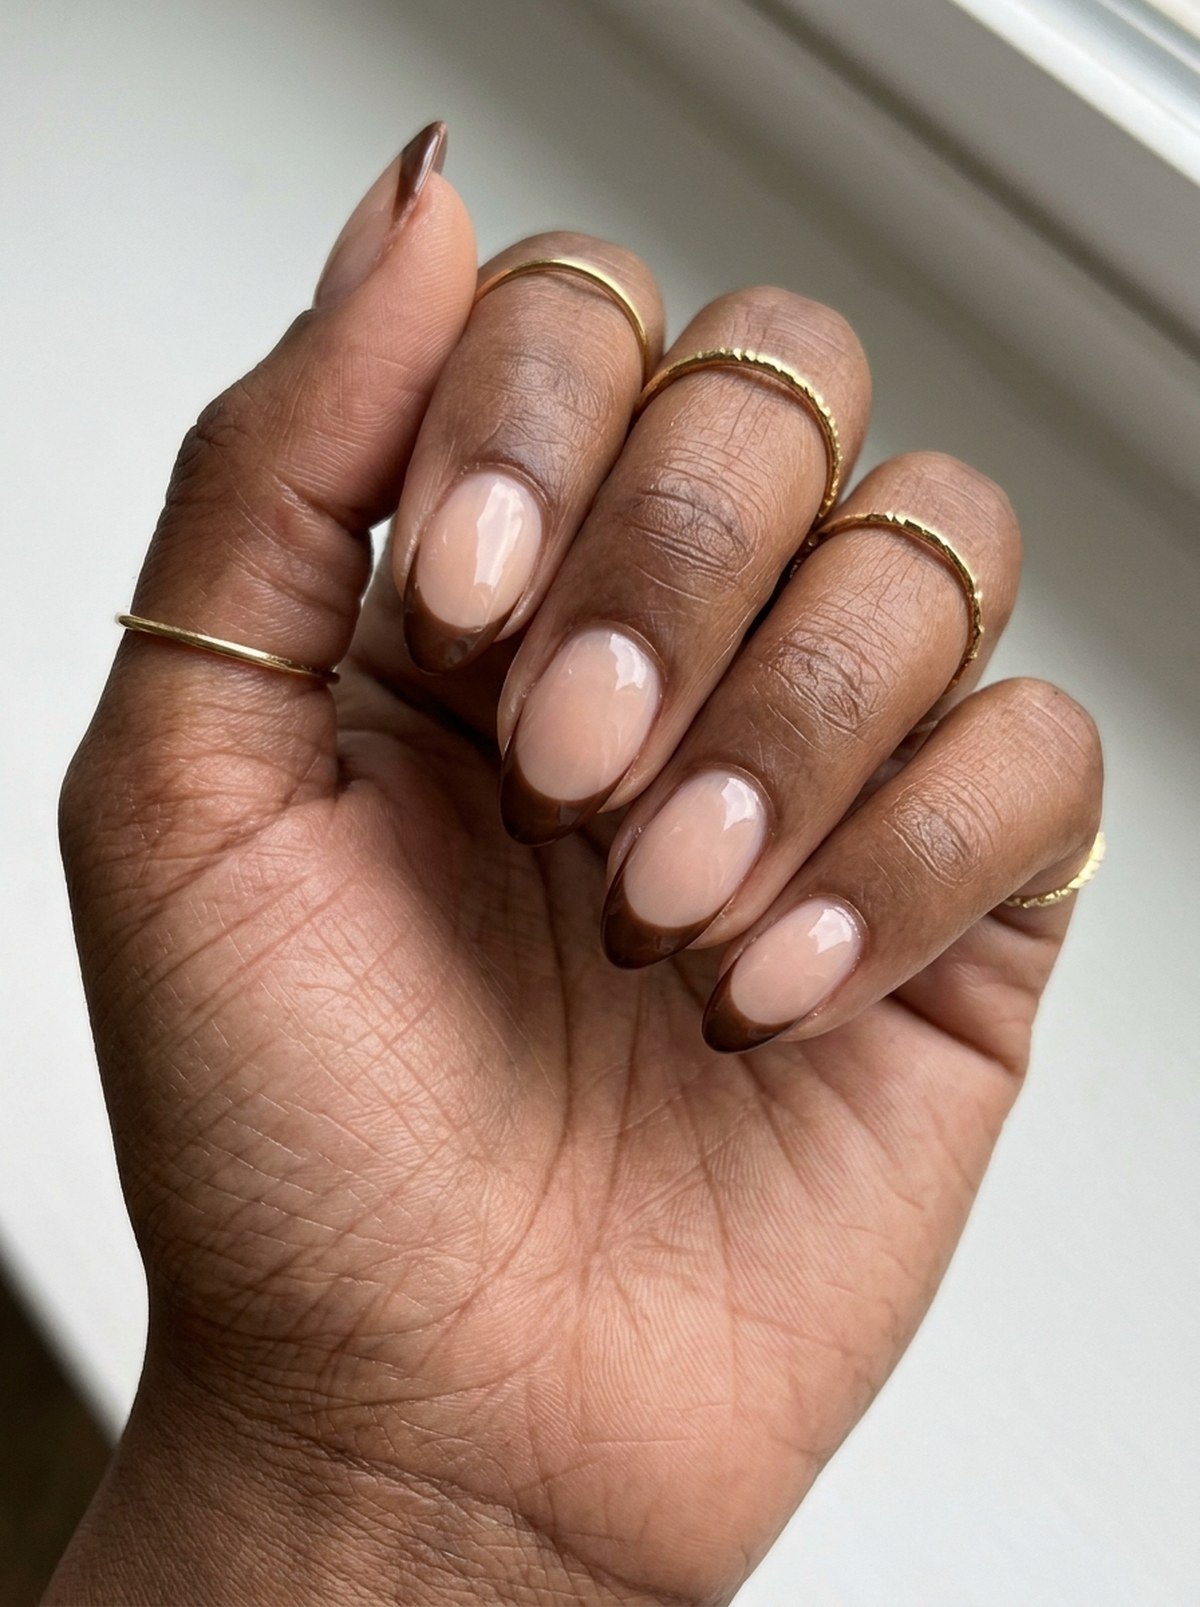
A French manicure, but make it winter: sheer nude base, espresso French tips, glossy as polished coffee. It’s the design to pick when you love French tips but find white tips a touch plain in December. The brown tip is softer than black, warmer than burgundy, and it goes with every winter outfit you own.
Ask for the tip painted with a steady hand and a crisp smile line, and keep the nails medium almond so there’s room for the tip to breathe. The base stays sheer nude, not milky, so the espresso has something soft to sit against. It’s festive without a single snowflake — and it lasts straight through January.
Get the look: a sheer nude gel polish + espresso gel for the tips.
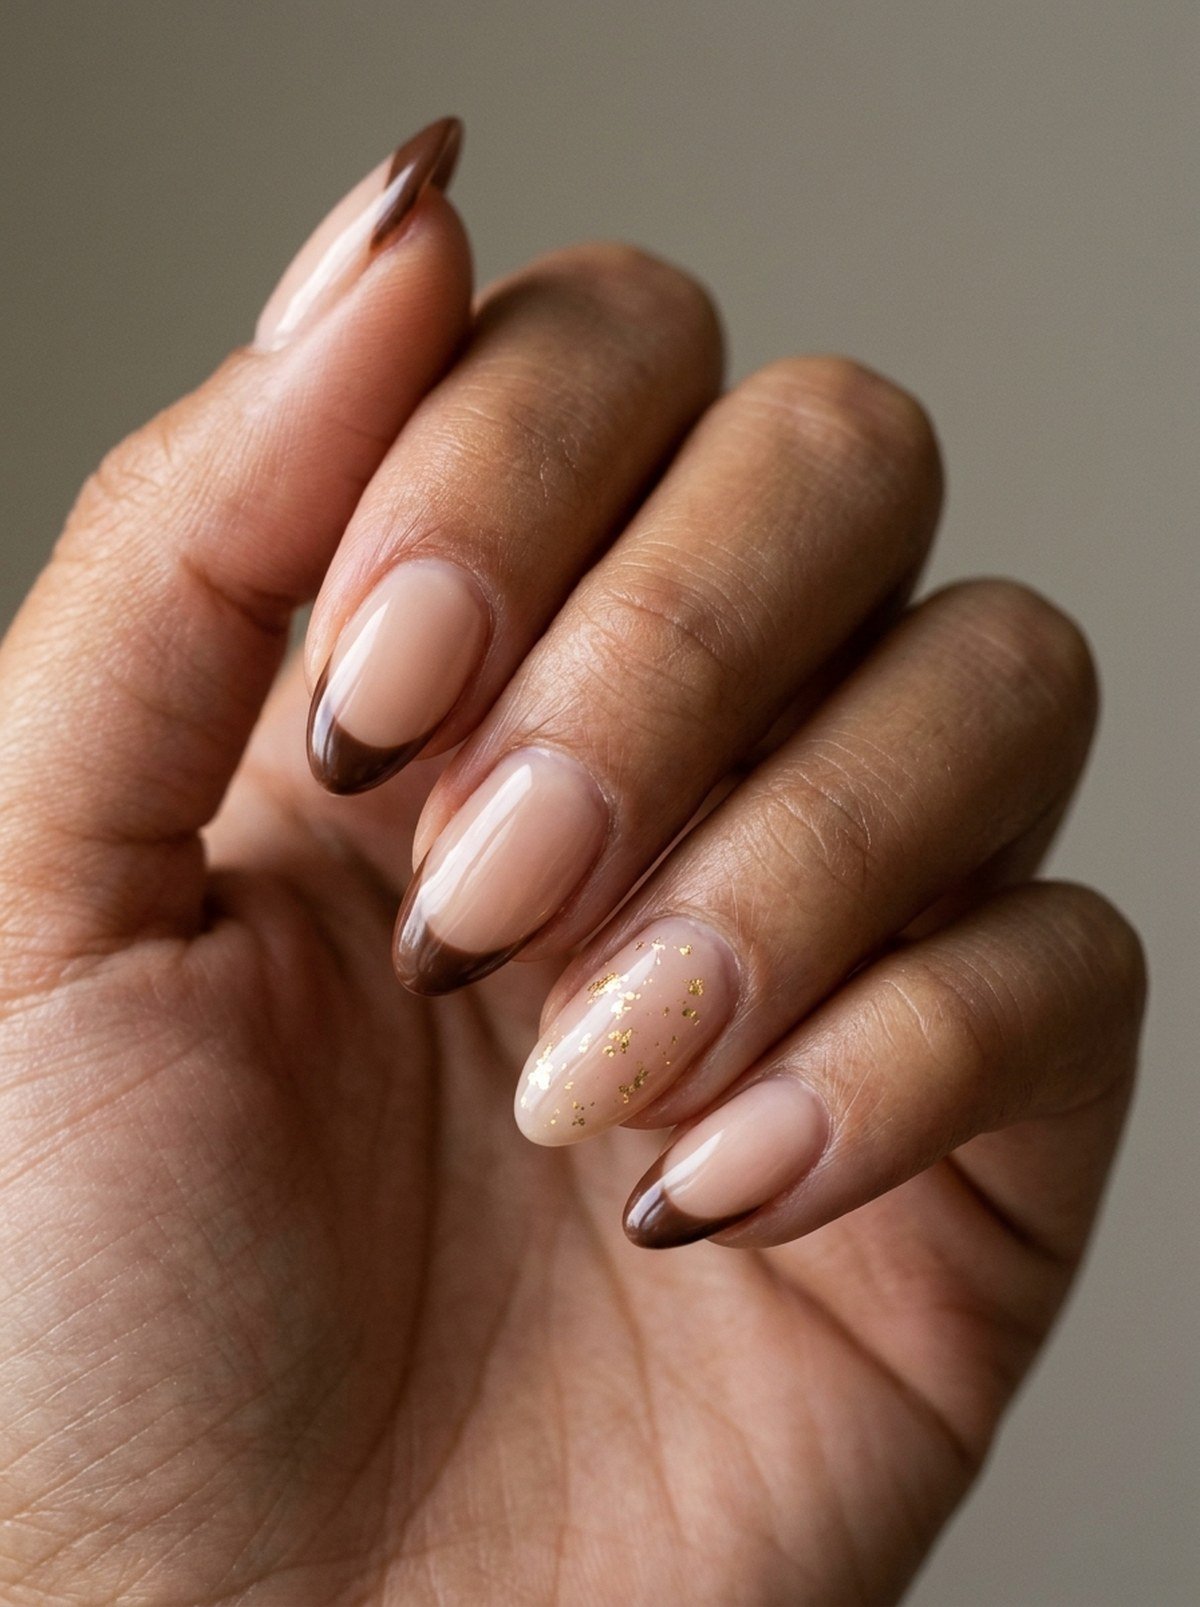
8. Chocolate French with Gold Foil
Chocolate French tips with scattered gold foil flecks on one accent nail — like light catching cocoa. The brown is rich and warm, the foil is the only sparkle, and because it’s broken into tiny pieces rather than one sheet, it reads as light, not loud. It’s the most expensive-looking French on this list.
Keep the foil to one nail, and ask for it broken into tiny pieces, pressed into the tip while the gel is still tacky. Too much foil and it turns into a statement nail that fights the rest of the hand; a little, and it looks like you caught the light just right. Gloss over everything so the foil sits flat.
Get the look: a sheer nude gel polish + chocolate gel for the tips + gold foil flakes.
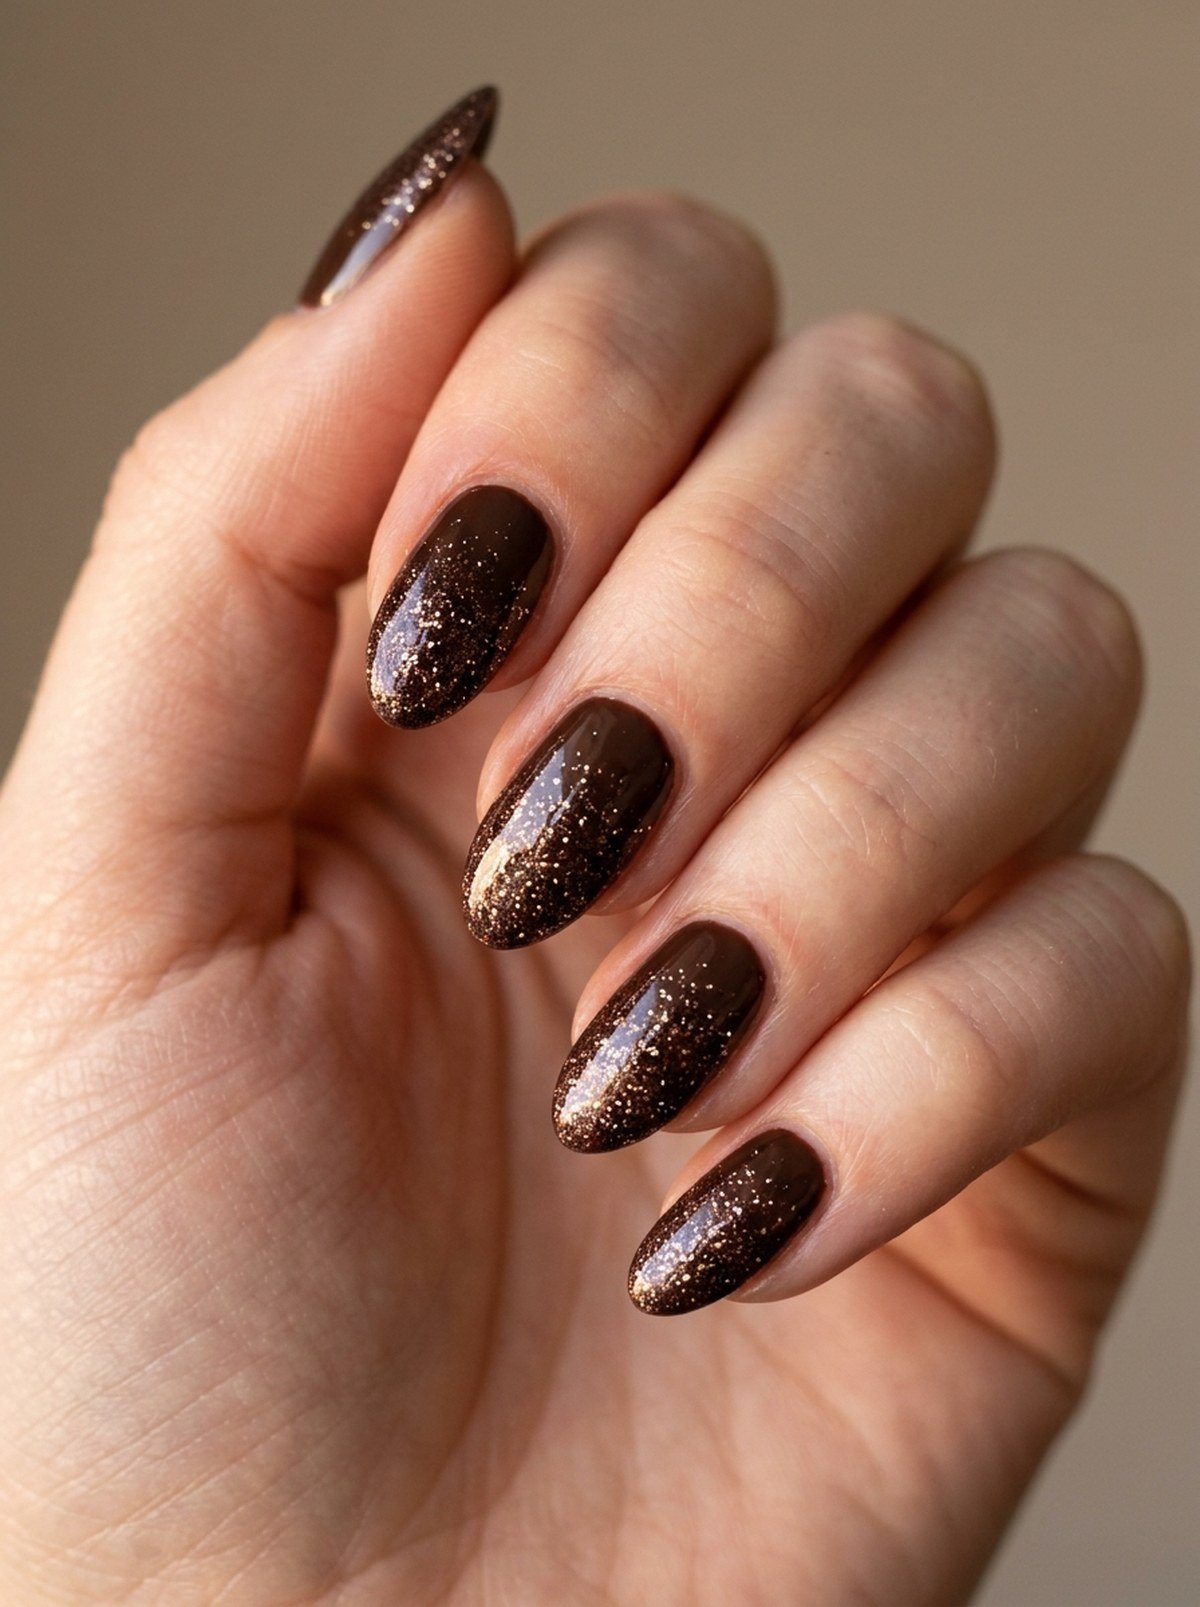
9. Chocolate Glitter Fade
A glitter fade is the easiest way to wear sparkle without looking like a party cracker. Chocolate glitter starts at the tip and fades down into a deep brown base, with fine gold glitter dusted over the top — like fairy lights reflected in a dark window. It’s sparkle, but soft, and it works for Christmas and New Year’s Eve alike.
The trick is the fade: it should melt, not stop in a hard line. Ask for a sponge application on the glitter and a smooth top coat over everything, so the nails feel glassy, not gritty. Keep the other nails plain chocolate so the glitter ones shine — two glitter nails per hand is plenty.
Get the look: a deep chocolate gel polish + chocolate and gold fine glitter, sponge-blended.
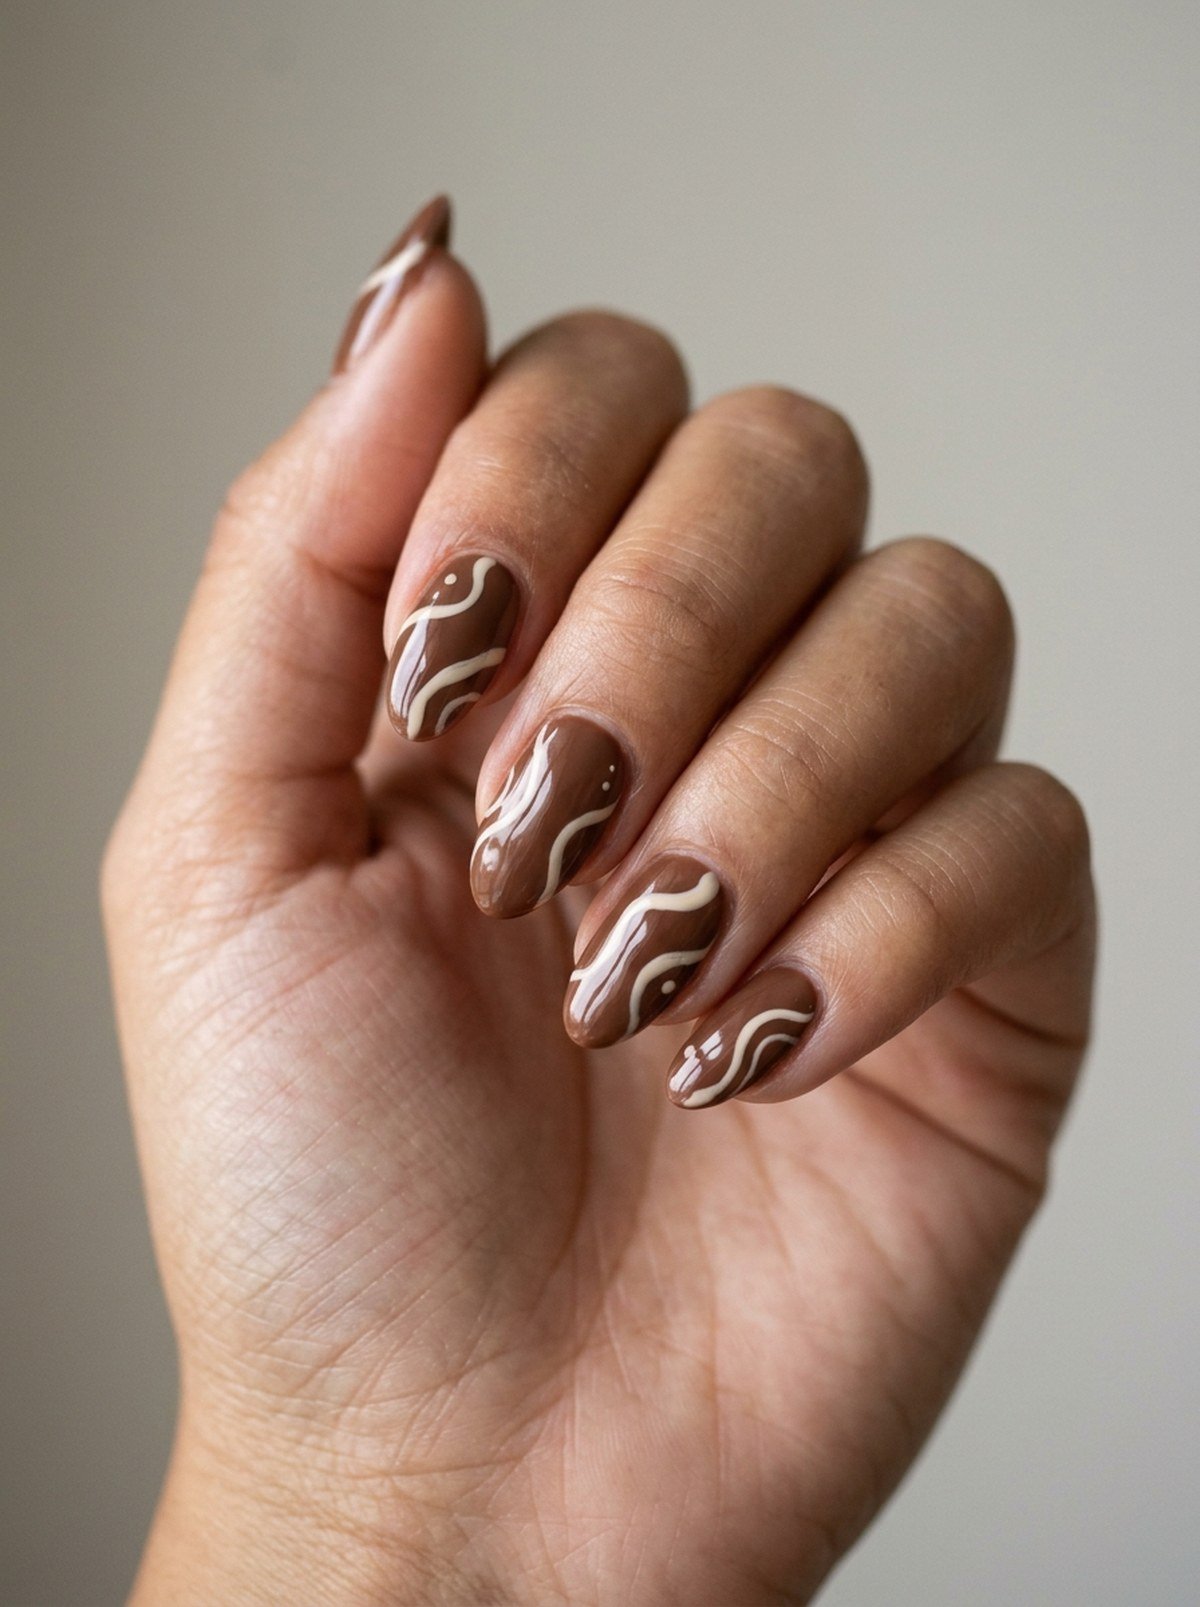
10. Chocolate & Cream Swirls
Chocolate and cream swirled together — like latte art, but on your nails — is the prettiest brown design that isn’t just one colour. A milk-chocolate base with cream swirls painted over it, soft and marbled, reads as cosy, as coffee, as the warmest thing in the room. It’s the design strangers actually ask about, because it looks hand-painted in the best way.
Ask for the swirls painted with a thin brush while the base is still slightly tacky, so the cream melts into the chocolate instead of sitting on top of it. Keep the swirls loose and different on every nail — identical swirls look printed, and this design is all about looking handmade. Gloss is non-negotiable: it makes the swirl look wet, like fresh latte art.
Get the look: a milk chocolate gel polish + cream gel and a thin brush for the swirls.
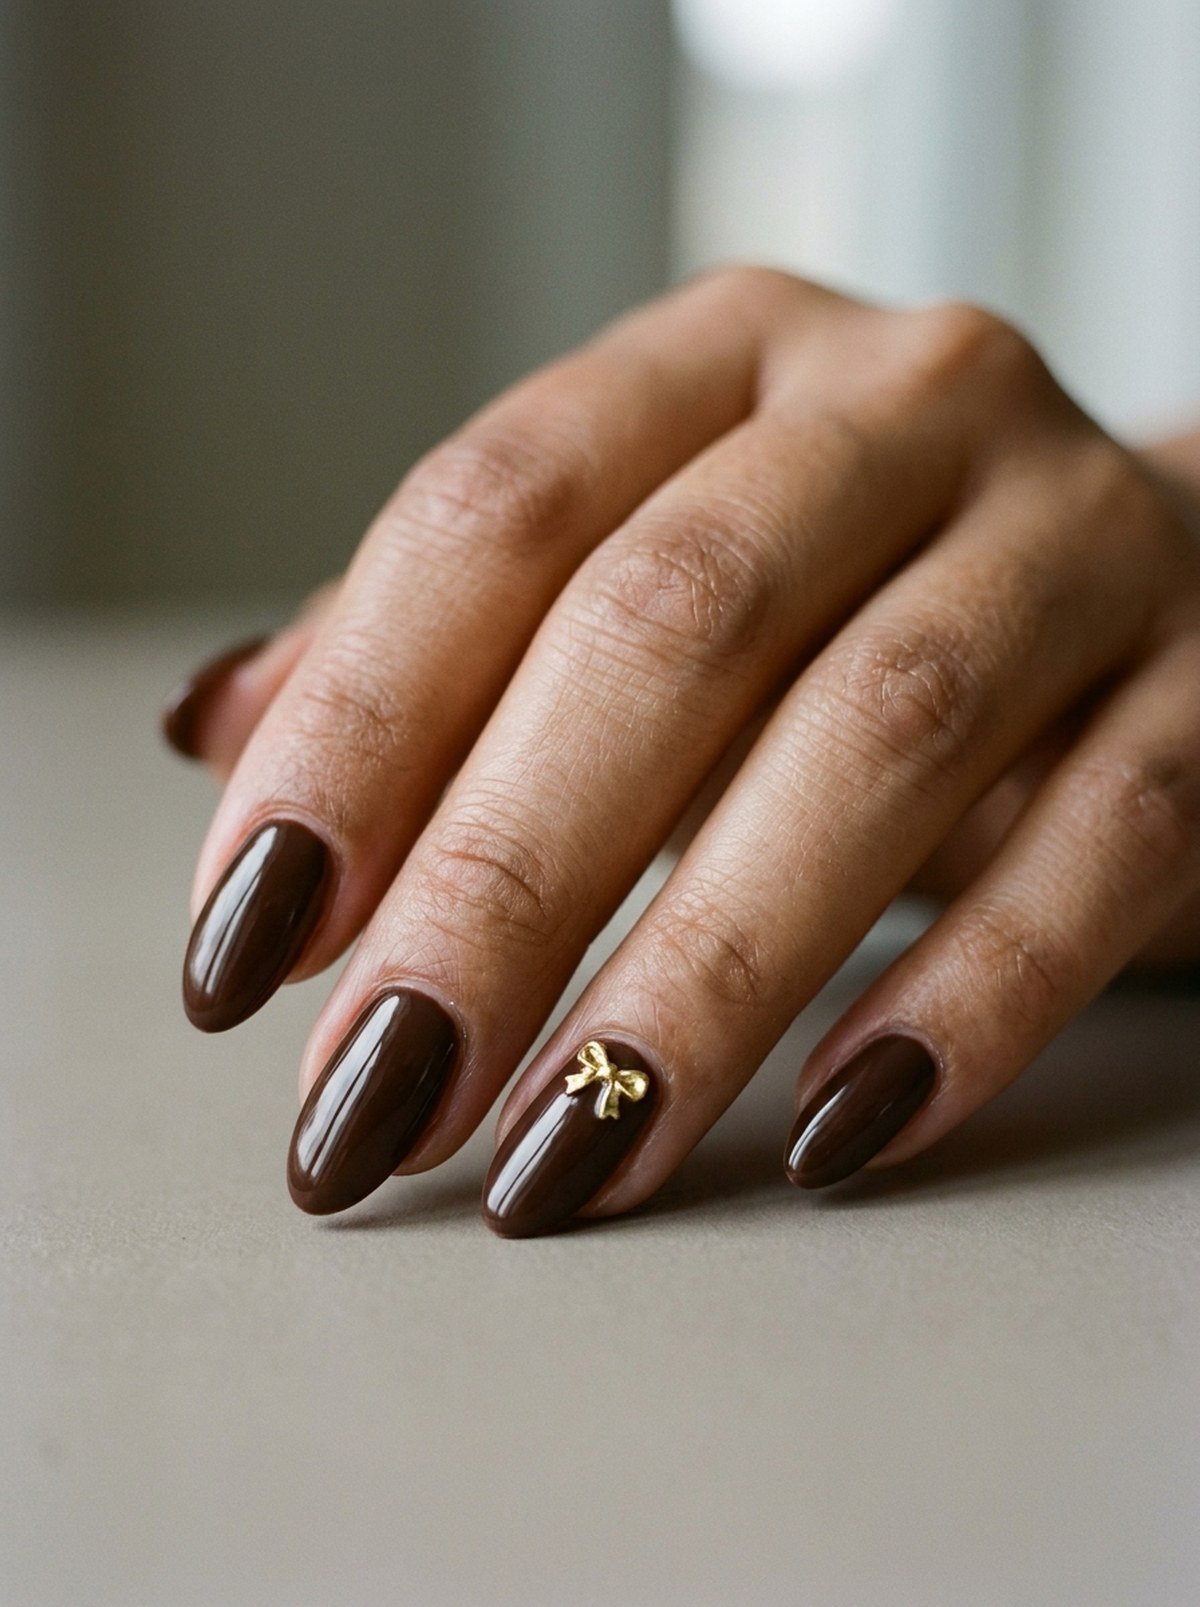
11. Dark Chocolate with a Gold Bow
A clean dark-chocolate base, and one tiny gold bow sitting where the tip meets the base on the ring finger — like a little gift tag on the nail. It’s sweet without being childish, because the bow is small, gold (not bright pink), and there’s only one of it. The rest of the hand stays perfectly classic, which is what makes the bow work.
Place the bow near the cuticle, not in the middle of the nail, so it reads like jewellery. Ask for it hand-painted in metallic gold gel, or a tiny 3D bow charm glued flat — either way, keep it small enough that it doesn’t catch on your knit. It’s the chocolate design for Christmas Day, full stop.
Get the look: a dark chocolate gel polish + metallic gold gel for the bow.
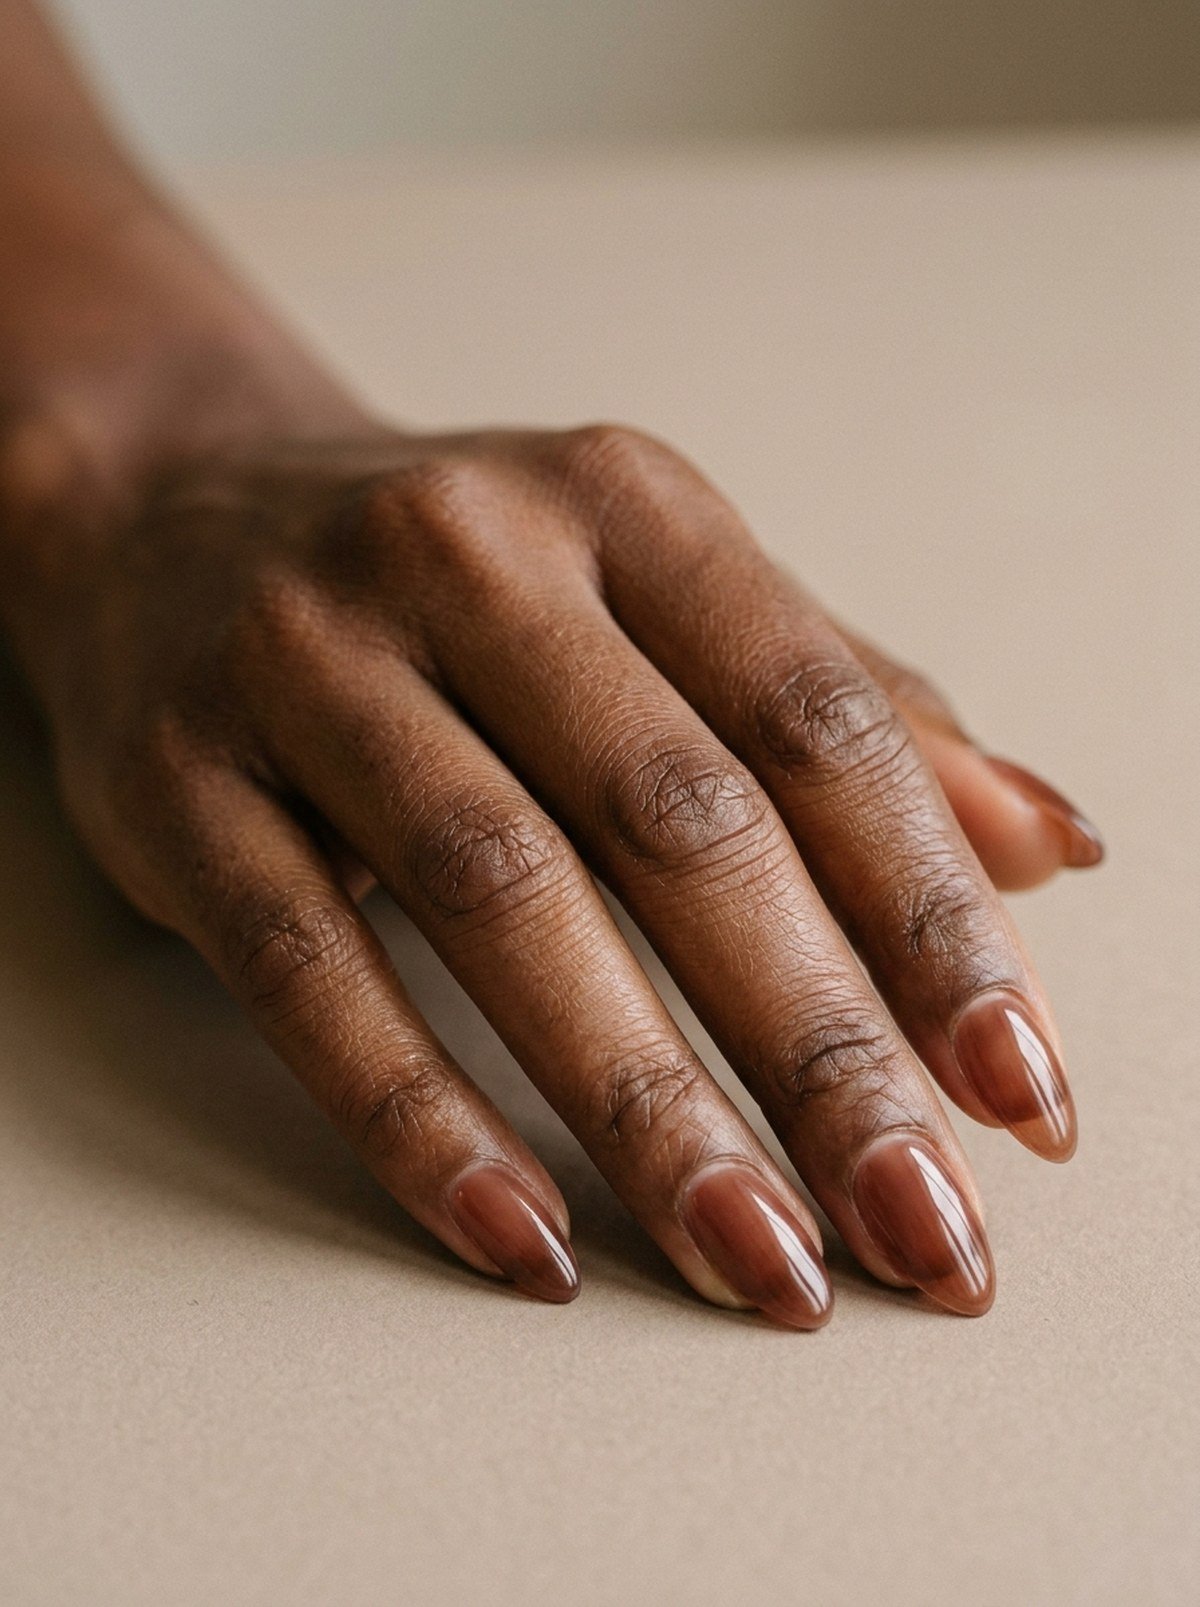
12. Cocoa Jelly Glass Nails
Jelly glass is the quietest chocolate here: translucent layers of cocoa, built up until the nail looks lit from inside, like stained glass in a warm brown. It’s the design for girls who find solid chocolate a touch heavy, because jelly lets your natural nail show through — softer, sheerer, and somehow more expensive-looking for it.
Ask for two or three thin jelly coats rather than one thick one, so the colour builds evenly and the nail stays translucent. Gloss over everything, and the jelly catches the light every time your hand moves. Keep the nails medium almond — jelly needs length to show its depth.
Get the look: a cocoa jelly gel polish, layered thin + glossy top coat.
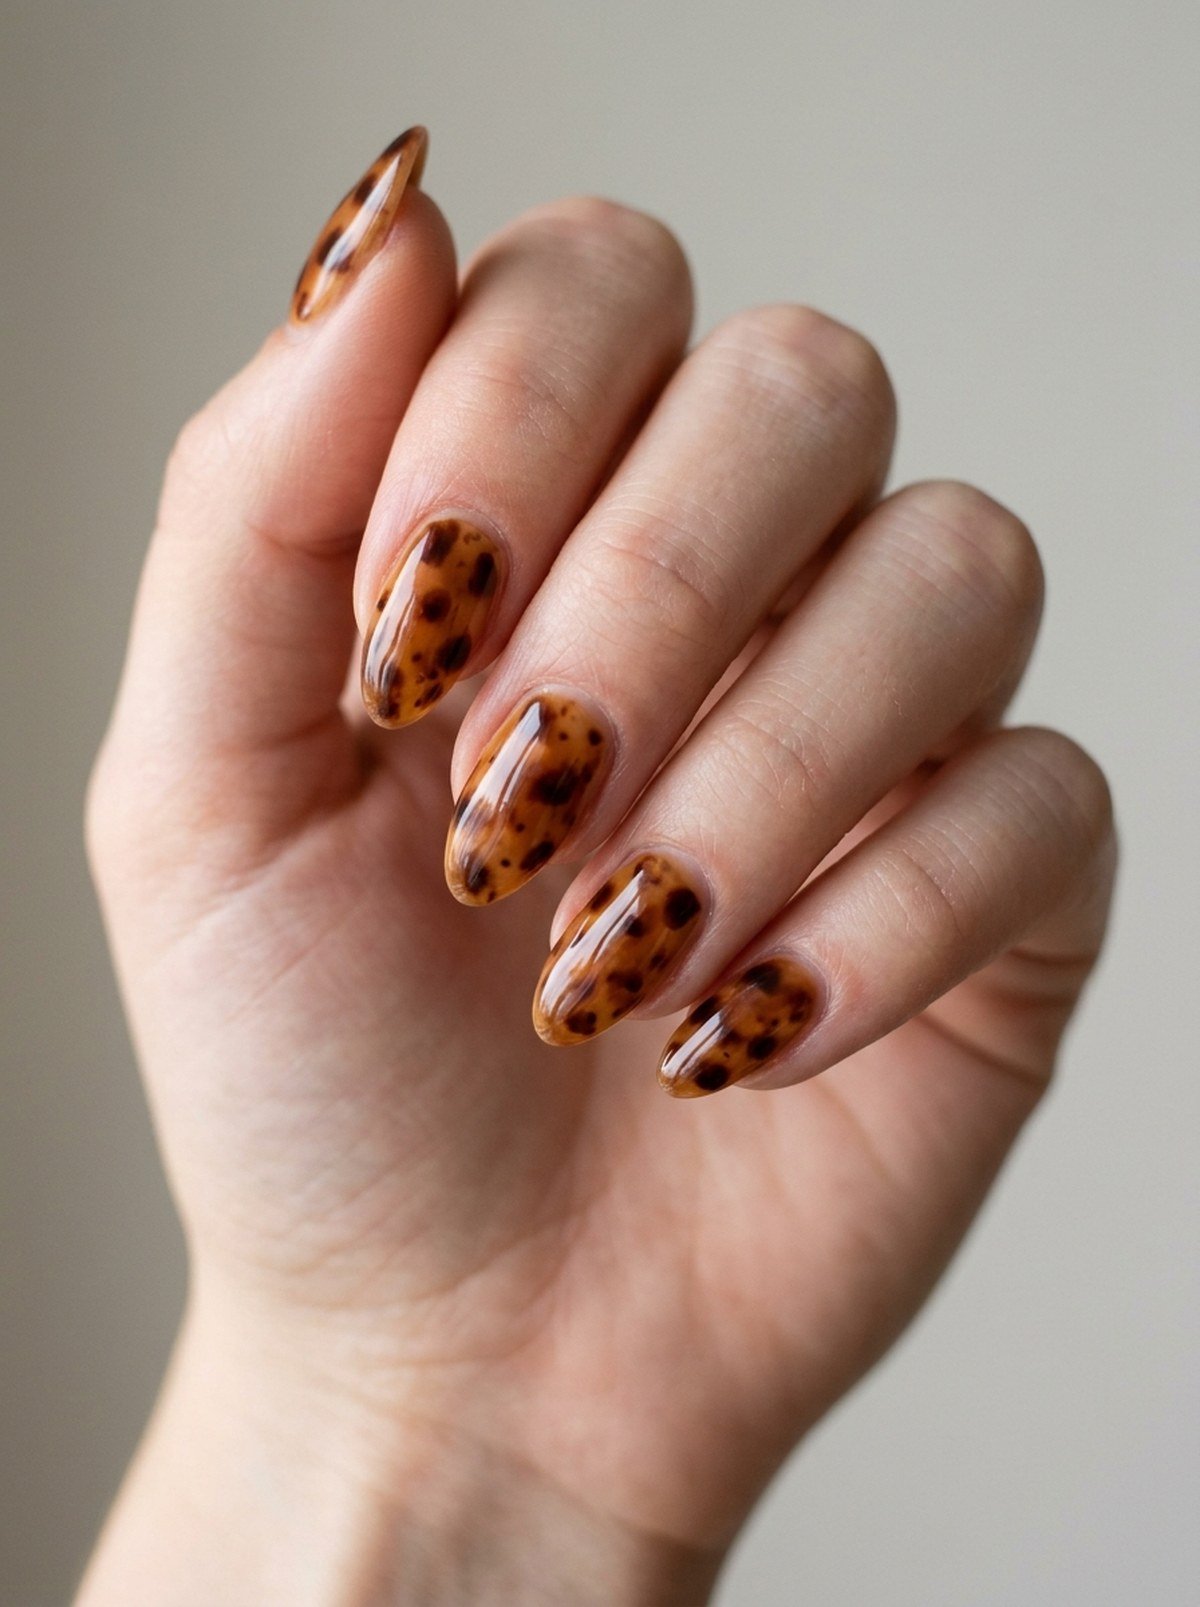
13. Chocolate Tortoiseshell
Tortoiseshell is chocolate’s wild side: amber, caramel and dark brown marbled together, like the inside of a polished stone. It’s been one of the most-saved nail patterns all year, and winter is when it looks best — warm, rich, and completely different on every nail, which is the whole point. No two tortoiseshell nails should match.
Ask your tech to build it in layers — a caramel base, then amber and dark brown blobs, blurred while tacky, then a glossy top coat to make it look like glass. It’s a skilled design, so show your tech the photo and ask if they’ve done tortoiseshell before; if they haven’t, pick a simpler design from this list and save this one for a tech who has.
Get the look: caramel, amber and dark chocolate gel polishes, layered + glossy top coat.
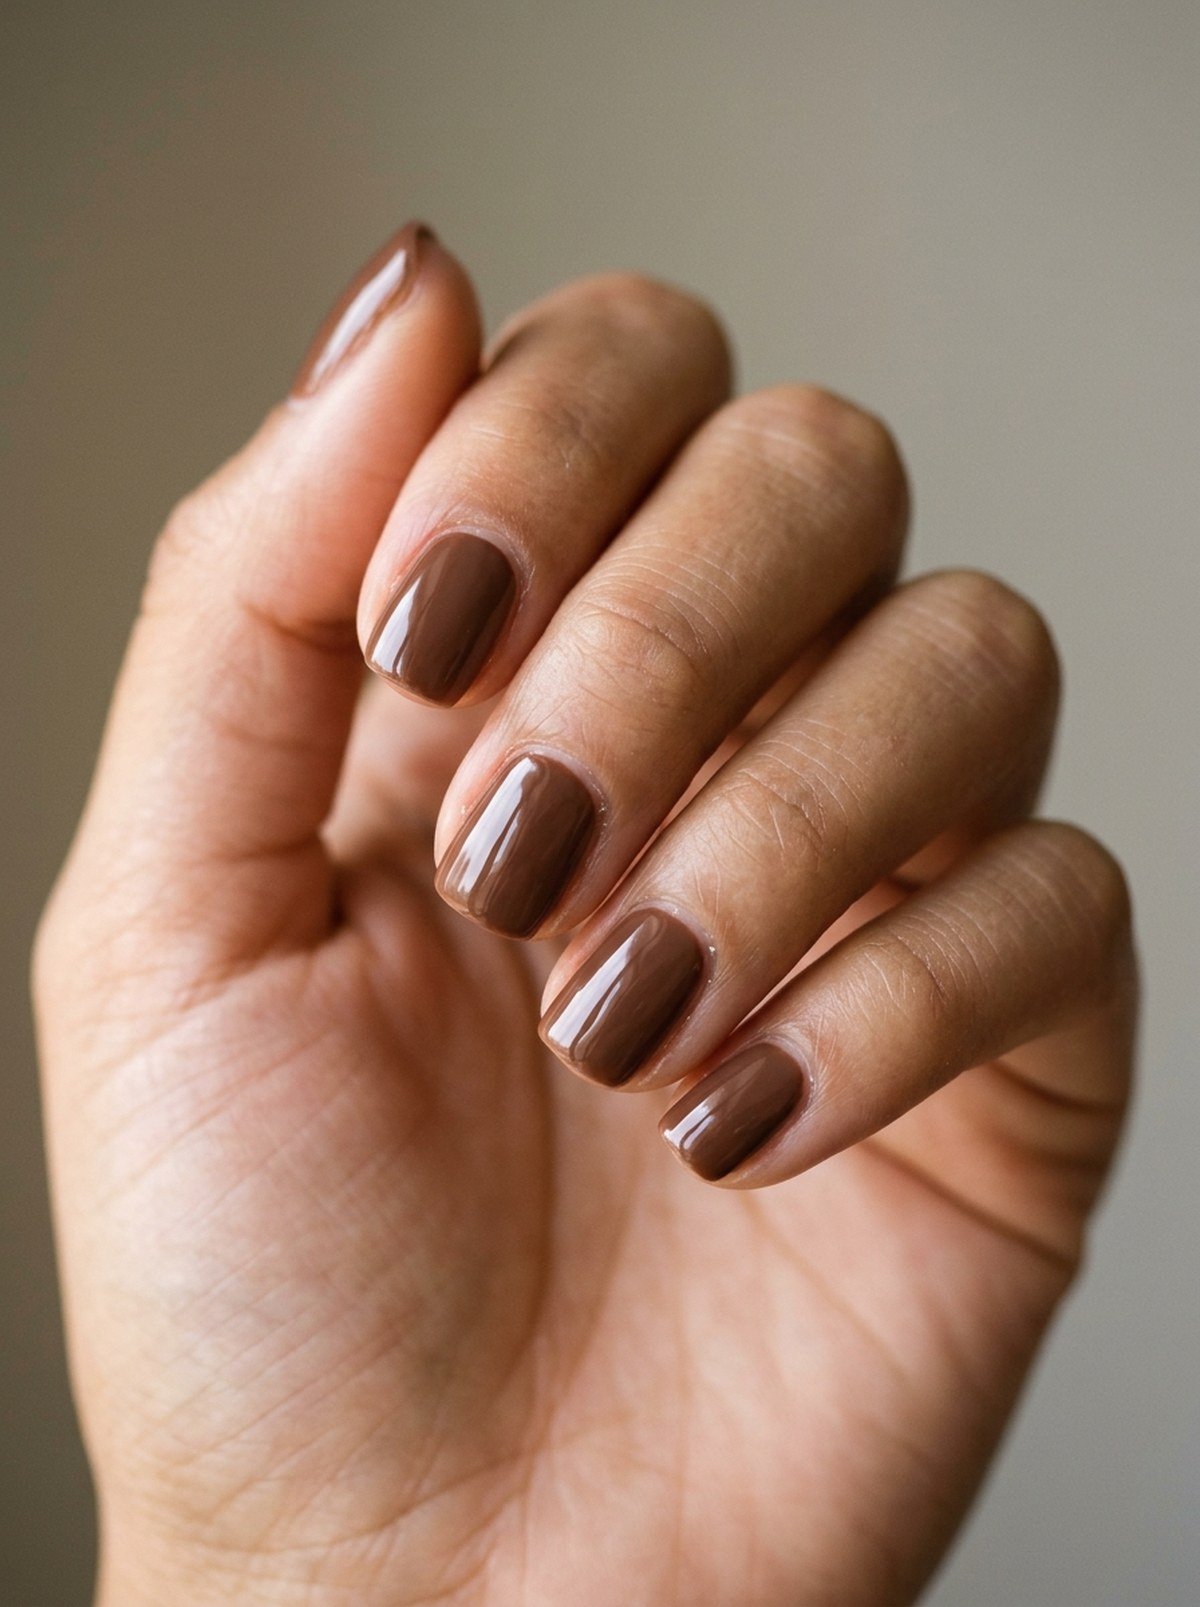
14. Short Milk Chocolate
Short nails can do chocolate too — they just need the right shade. Milk chocolate on short squoval nails is proof of it: warm, neat, practical, still so expensive-looking, and you can actually type, cook and wrap presents in them. It’s the design for girls who love brown nails but live a real life in them.
Keep the shade milk, not dark, because a short nail needs warmth to make its point, and gloss is what makes a short set look salon-fresh rather than home-done. Ask for the cuticles immaculate and the shape neat — short chocolate only works when it’s tidy, and tidy is easy when the colour is this forgiving.
Get the look: a milk chocolate gel polish + glossy top coat.
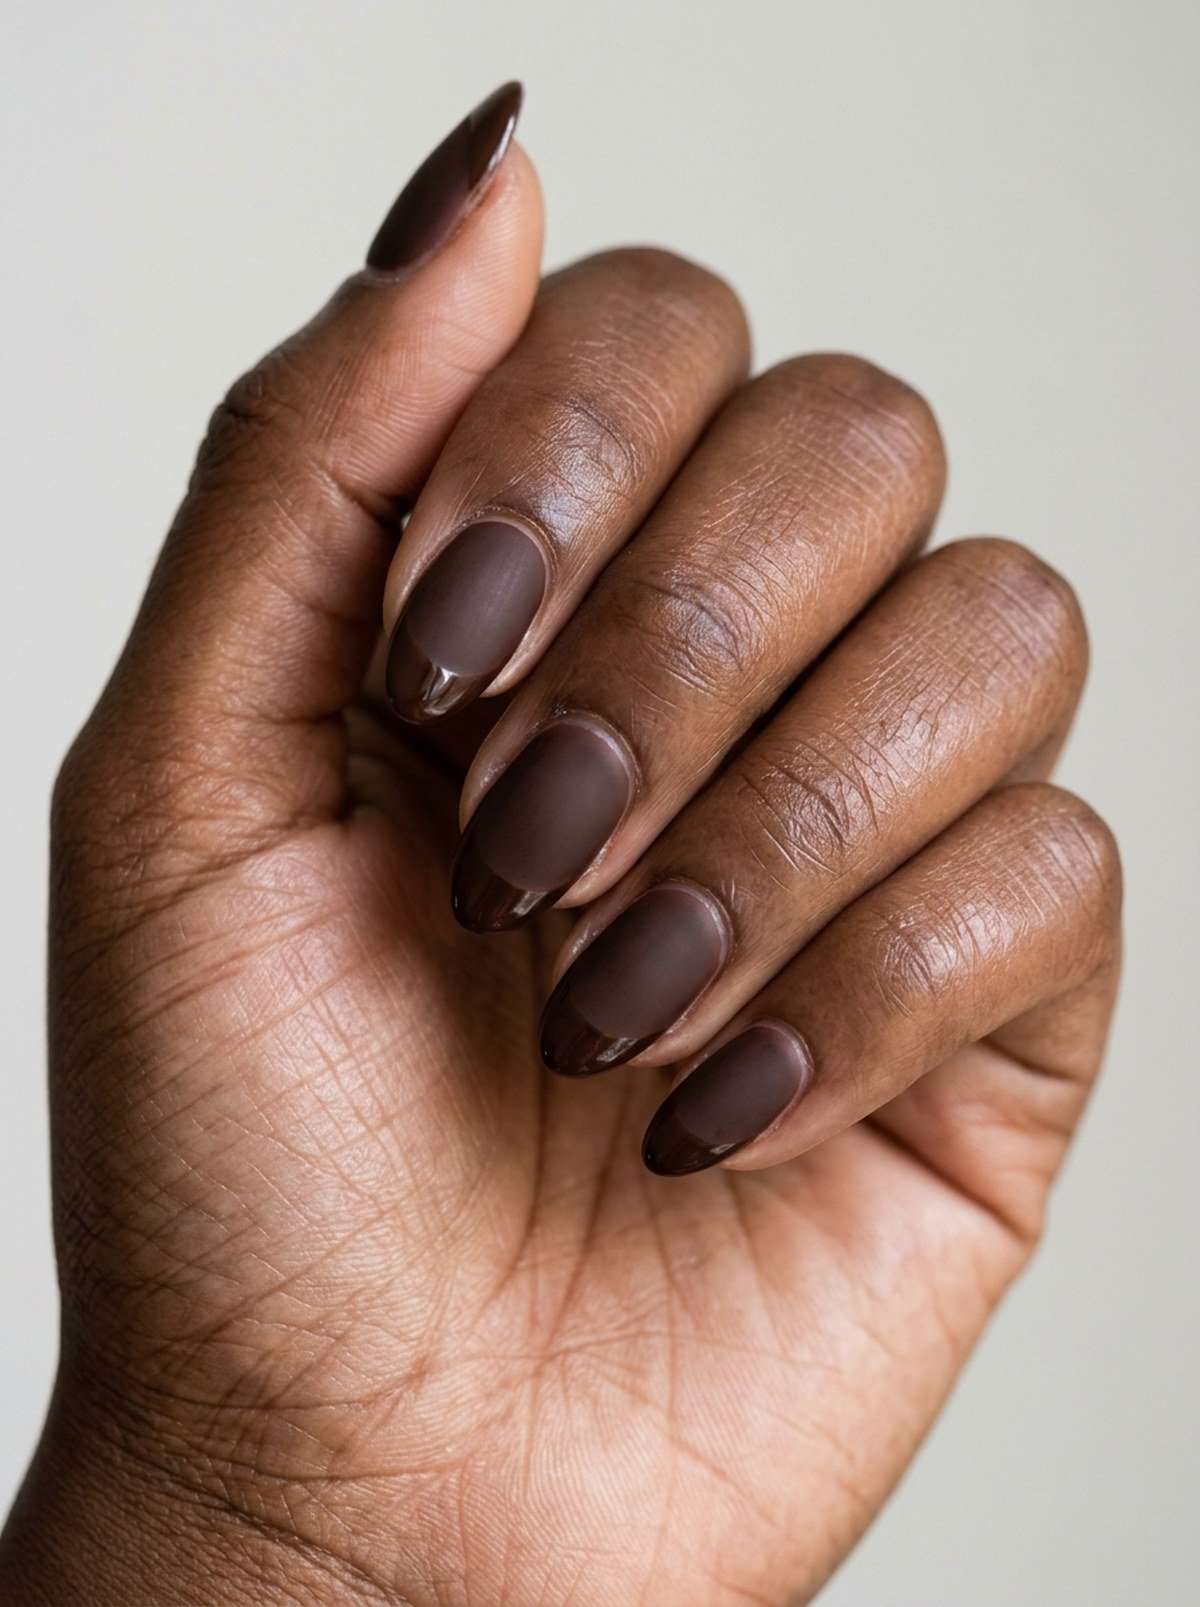
15. Chocolate Matte with Glossy Tips
Matte chocolate with glossy tips is the texture trick of this list: a matte dark-brown base, and the French tip painted in the same brown but glossy, so the tip appears and disappears as your hand moves. No colour change, no glitter, no art — just shine against matte, and it’s the most expensive-looking design here.
Ask your tech to paint the tips in glossy top coat over the matte base, or in the same brown with a gloss finish — either way, the difference is shine, not colour. That’s the whole trick, and it only works if the base is truly matte. Seal the tips carefully, and just be gentle with the matte — it shows fingerprints, but that’s also how you know it’s real.
Get the look: a matte dark chocolate gel polish + glossy top coat for the tips.

16. Chocolate & Gold Chrome French
Two chromes instead of one colour — a chocolate chrome base with gold chrome French tips, like a French manicure dressed for a party. From across the room it reads as pure shine; up close, there’s your brown and gold. It’s the one girls who never do nail art actually ask for, because chrome is the art and gold is the jewellery.
It works because the two chromes are kept clean and separate, so the whole hand stays polished. Ask for the gold tip painted with a steady hand and a crisp smile line, and keep the nails medium almond or squoval so the chrome stays in proportion. No glitter needed — the shine is enough.
Get the look: chocolate chrome powder over a dark base + gold chrome powder on the tips.
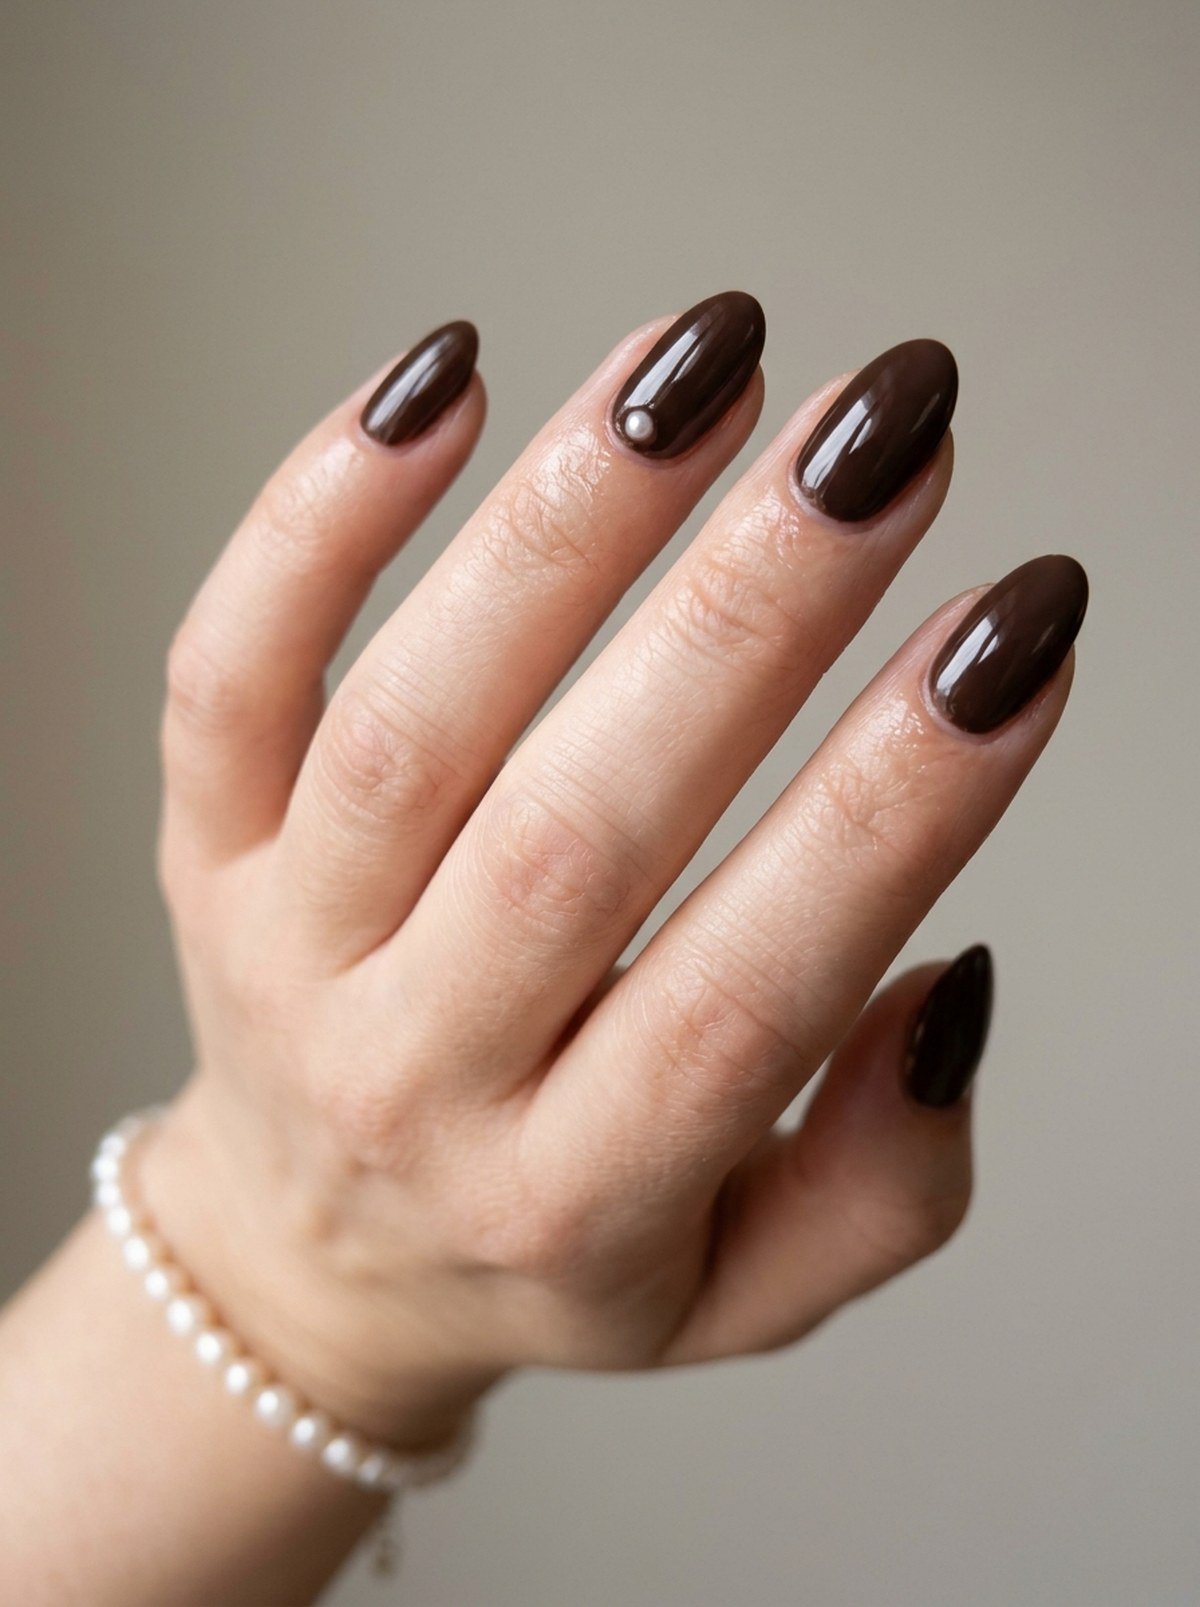
17. Chocolate Brown with Pearl Accents
Chocolate and pearls are winter’s softest pairing: a deep brown base with one tiny pearl on the ring finger, like a drop of cream on cocoa. It’s sweet without being childish, because the pearl is small, real-looking, and there’s only one of it — or one per hand, if you’re a minimalist. The rest of the hand stays perfectly classic.
Place the pearl near the cuticle, not in the middle of the nail, so it reads like jewellery. Ask for it glued flat with gel, not just stuck on top, so it survives the whole wear — a pearl that falls off on day two is worse than no pearl at all. Gloss over everything else, and leave the pearl itself unsealed so it keeps its shine.
Get the look: a deep chocolate gel polish + tiny pearl nail charms + nail glue.
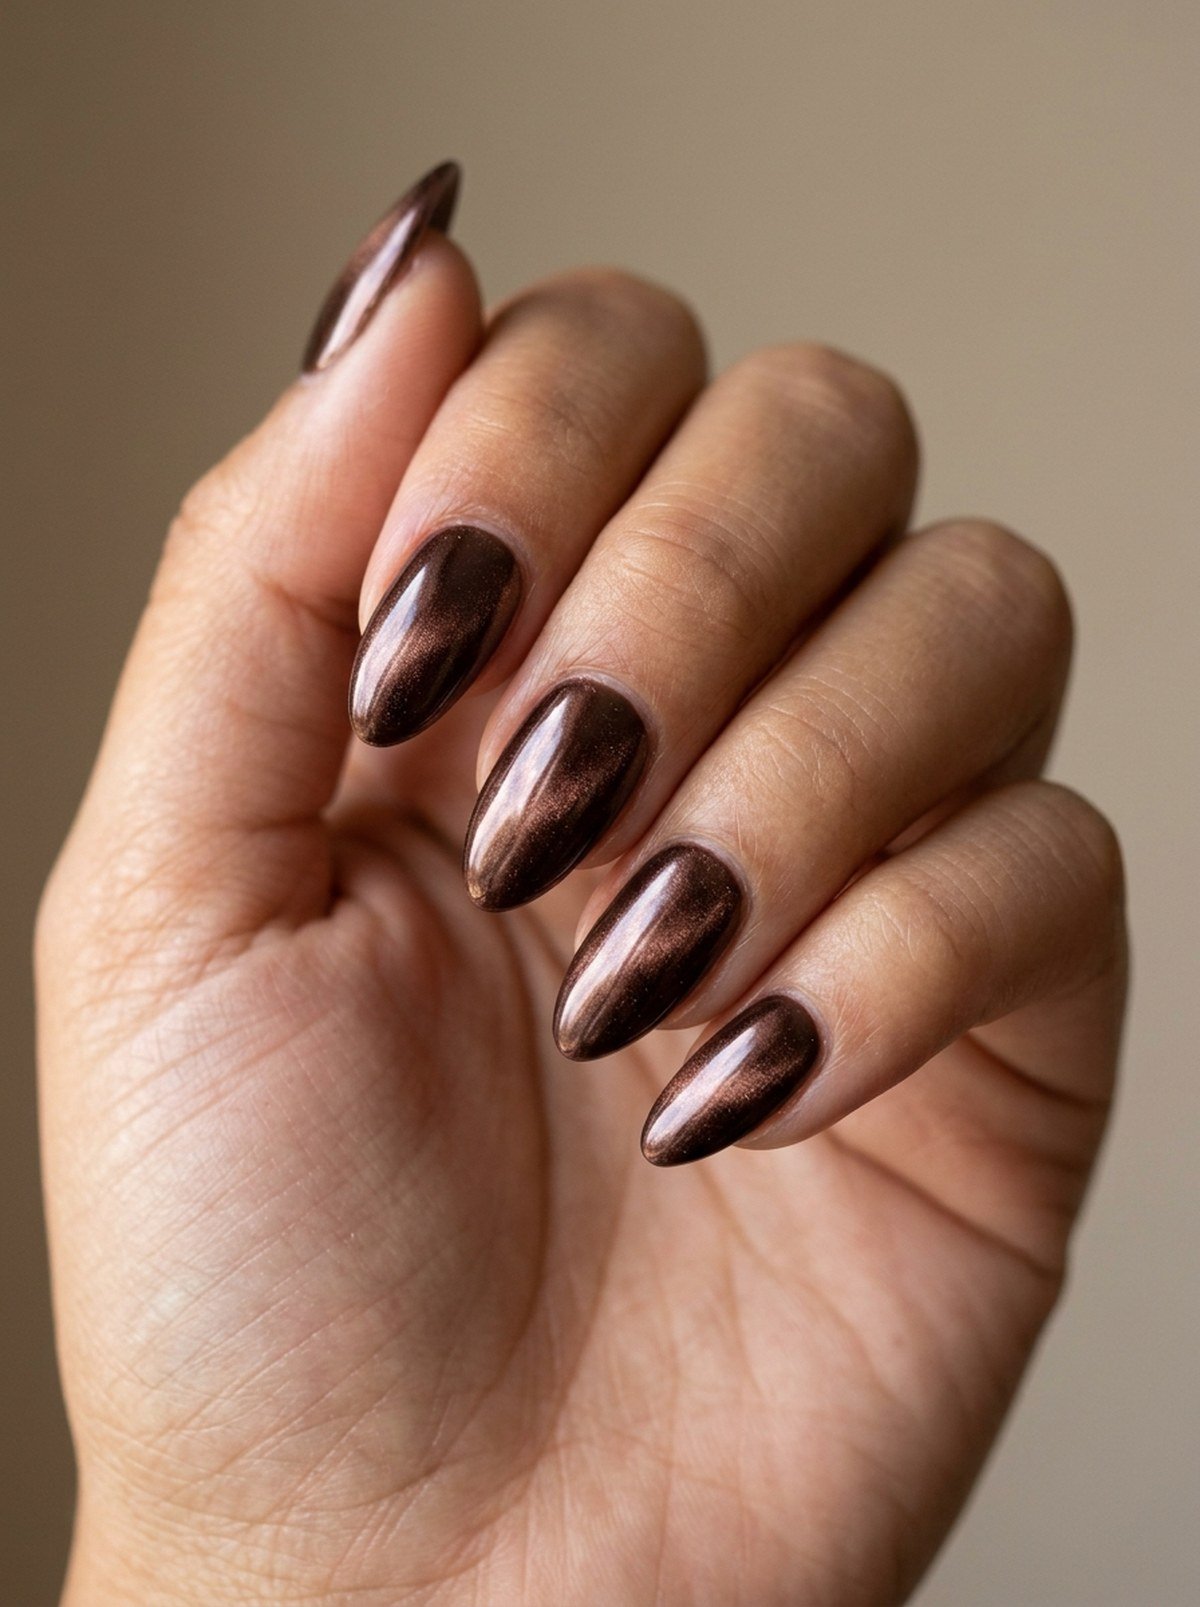
18. Chocolate Press-Ons
No salon appointment before the party? These press-ons are the answer — a ready-made set in chocolate chrome and velvet, salon-shaped, glossy, and on in ten minutes. They look like the real thing in photos and at arm’s length, and they’re the easiest way to have chocolate nails for one night without committing for three weeks.
Pick a set in your shape (medium almond is the most forgiving for chrome, since the shine needs length to show), file the sides lightly so they sit flush, and use nail glue rather than sticky tabs if you want them to survive the whole evening. A drop of cuticle oil at the end makes the whole set look freshly done.
Get the look: a chocolate chrome and velvet press-on set + nail glue + cuticle oil.
Which Chocolate Brown Winter Nails Should You Pick?
If you want one set for all of winter, pick #1 Classic Dark Chocolate Gloss or #4 Solid Espresso — they go with everything and never feel like a costume. If you love shine, #2 Chocolate Chrome or #3 Chocolate Velvet Cat-Eye will carry you straight through to New Year’s Eve. And if you’re a minimalist at heart, #6 Milk Chocolate with a Thin Gold Line is your winter — barely there, completely rich.
Screenshot your top three, show your tech, and save this post for your next appointment. Winter looks good on you.
More winter looks: our 20 Winter Nail Designs That Aren’t Christmas and 15 Midnight Blue Velvet Cat-Eye Nails. For the polishes, a pro starting point is OPI.


